Showing posts with label homesteading. Show all posts

13 October 2009

The wrap up


The garden is all but finished for the year, just a lonely row of cabbages, kales and Brussels sprouts, along with a patch of frost hardy parsley, and a few late onions in the ground. Everything else has found a place in the pantry, the spice rack, or the cool room. Tomatoes of all stages from green to yellow to pink are ripening, an abundance of green, yellow and red peppers will keep for a few weeks at least. The potatoes are in their bins, carrots and parsnips in their sacks, pumpkins and squash on their shelves. Even the rooster and the bucks have found their way to the pantry this weekend, as canned meat and rich broth. Well, the rooster only got as far as the table really, one of the many harvest feasts we enjoy this time of year. So it's quite a bit quieter around here.

It is interesting, wrapping up the season, but this time, not making those thousand preparations in anticipation of next year's garden. No seed saving since we want to start again with bio-regional varieties, although I am a thousand times tempted to stash away a few packets, out of a reflexive sense of preservation. But we have no rare varieties in need of salvation. And the practical consideration of moving cross-continent by bicycle keeps our load light. (Of course there are some things we will be shipping across like my trusty pressure canner, my treasured spinning wheel, our solar panel, etc.) But there is no safe passage for seed, so I let them scatter, and smile at the thought of all of these volunteer vegetable seeds, springing up in the re-planted pastures after we are gone.

When we go, no one will take over our garden, it will go back to pasture, cut for hay once a year. But I take heart in knowing we have made some small improvements to the soil, we leave our treasures for the worms, the insects, the invisible biota living out their secret lives, and for the birds that have become our constant companions in the garden.

The kitchen this time of year has the feel of industry: the pressure canner sputtering, wood stove chugging along, and food, always food, in every stage of preparation and storage. There's always a job to do, but not in a bad way, each job has it's pleasure and satisfaction. I sometimes feel as though I have a thousand clocks in my head, or rather kitchen-timers, each one set sometime in the spring, when seeds were planted, kids born, each one with it's own duration. This is the time of year when everything ticks down, I'm constantly scanning the timers, and tending the tasks that are nearest to completion. I just have to scan my overflowing kitchen (spilling out into the living quarters this time of year), to see herbs in various stages of drying, baking beans to shell, curing pumpkins behind the wood stove, shrivelled ground cherries in the warming oven nearly dry, ripening fruit to sort and process.

It used to be quite overwhelming, in my first few fledgling years as a, well, a housewife. I no longer object to this word because I understand the skill, competence and dedication it demands. Well, truthfully, I'm only a part-time housewife, and only when it's too cold to pleasurably work outside! Now, I don't mind the small circuit of my daily routines, always in proximity to the warm stove, the heart of the household. But as soon as spring breaks, I'm a caged bird, set loose, I'm a gardener, a homesteader, and grudgingly maintain the house, emptied of it's stores of food, hollowed out, dormant.

But this winter feels different, we are spinning a cocoon this winter, weaving new dreams, with new adventures. And making room for a new beginning. Instead of the thousand preparations for next year's garden, we have the thousand preparations for a move. And mostly what consumes our immediate interest is our cycling adventure. We are bike obsessed. Researching tandems, anything we can find about them, and touring gear and routes and tips.

A tandem bicycle is perfect for us, I love the idea of the cooperation and coordination required. On a tandem we will be so much more in tune with one another, and working together on tough climbs, the same way we work together in the garden and household, coordinating our efforts, working with efficiency, and enjoying the companionship. Besides, tandems are fast!

I've also realized that I've come full circle with this blog, I've written about a 12 month cycle of growing and preserving our food. It has been good, it is a good record of what we have achieved, on a bare piece of land, on an empty road. And I hope it has been informative, after all, I know how much I have learned in the process. But we have come to a natural end, realizing there is only so far the two of us can go on this road to self-sufficiency, without turning to capitalism's infrastructure to support us: the ironic hypocritical conclusion to the independent quest of self-reliance. From where we are, we can see that communalism, collectivism, eco-socialism, whatever tag you want to put on it, is the least destructive way forward, perhaps the only way.

So this blog may find it's natural conclusion, or it may evolve, or we may move on to a new blog, leaving this one to archive the food-skills we acquired, perhaps returning to it when we plant our next seeds. Either way, we'll let you know.

26 June 2009

Garden Tour

My how the garden grows! Rainbow after a thunder shower only 10 days ago...

The view from the kitchen table this morning. There's a lot of bare ground in the foreground, that's where the cutworms have done the most damage, even getting into the herb beds. I was pretty surprised to see them cut herbs like savory, dill, cilantro, parsley, fennel, anise, basil, calendula, and poppy flowers seem to be a favorite treat of theirs. I removed all of the onion seedlings from the middle bed and will transplant them back into clean ground. We are working on constructing cutworm fences around the seed beds. They can climb, but not very high on slick vertical surfaces. I'll post more on the fences when we have them constructed and tested.
Here's another angle of the herb, greens and roots beds. We lost all of the beets, turnips, chard, spinach, direct seeded lettuce/mesculun, and a few plantings of carrots and parsnips are still struggling along. I scout the mature lettuce bed regularly, they only cut of the outer leaves of the larger lettuces, revealing their presence. Thank goodness there is only one cycle of cutworms per year, and it is coming to an end in a few weeks. So we will still have time for some later plantings of carrots, beets, greens and herbs.
On the left is the first planting of carrots and parsnips, they emerged before the cutworms, and got a bit of a head start. Still, the patches show the damage they have done. To the right, is the potato patch, and they are doing great this year, just starting to flower. The Potato Beetle damage is down to a minimum this year, we are finding only about 5 adults a day, up to 20 on windy days when they blow in from potato farms. To the right of the potatoes, the mulched area, a row of cukes, zukes, and winter squash beginning to flower. And to the right of the vines, my plot of small grains and seeds: popcorn, sunflower, amaranth, millet, quinoa, poppy seed, hulless oats. The cutworms have been working their way down the grains as well, and we are just starting to weed in there, so I'm self-consciously omitting a picture of them! I plan to do a post on these small grains and seeds as they mature.


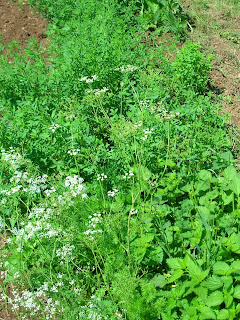
This is my wild, overgrown perennial/biennial herb bed. I underestimated the amount of room the perennials would need in their second year. I left some biennials (caraway, parsley, mullein and chicory) to go to seed in the same bed, so next year the nettle, alfalfa and comfrey will have enough room to expand.
A quarter acre plot of Hard Red Spring Wheat for bread baking, and about 1500 row feet of dry peas, to harvest for the chicken's winter feed. On the right you can just see the newly worked ground, 3/4 acre, for planting grains next year, with the market peas and beans moving into this grain plot. To the left of this picture is about 2000 sq ft of millet (not worth picturing as it is just emerging), to be harvested for chicken feed.

In the lower garden, our green beans and baking beans, as well as our dry peas and shelling peas. As well as a row of Naked Seeded Pumpkins between the peas. We got a few inches of rain this week, warm nights, and a hot sunny day today, so everything is growing by inches.

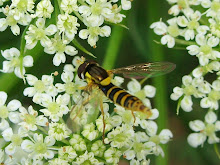
Next to them, the brassicas and ground cherries. The Flea Beetles never did make it down to the transplants, after giving my turnips and radishes a hard time. And now I can hardly find a Flea Beetle in the garden, I'm pretty sure the Soldier Beetles finished them off, their population exploded around the time the Flea Beetles' declined. The cutworms were beginning damage some of the brassicas, so we stuck small nails along side the stems to prevent them cutting the entire stem off, they still climb up and take a leaf here and there, but we scout these areas too, and dig them up.

My first promising tomato on an early ripening Latah variety. These are bare, spindly plants, but they produce plenty of fruit, and always ripen earliest. The bushier Cherry Fox and Roma tomatoes are twice the size, but just starting to produce green fruits.

Hungarian Hot Wax and Carmen Peppers just starting to flower. We spike them with nails as well, to prevent any cutworm damage. We've been babying these peppers along for nearly 4 months now, I don't think I could stand to see one of them toppled.

And our first crop of snow peas in the market garden is about a week away, they started to flower a few days ago. The succession of peas and beans stretches out to the millet and wheat crop. We spaced our successional plantings by 10 days, and in the early spring, those 10 days make a big difference, but our last two plantings are nearly identical in size. It's amazing what a little heat and rain will do!

22 June 2009

Makin' hay while the sun shines

That's the trick around here, in a humid climate there are short weather windows. The best quality hay, and the highest protein hay, is made from pastures in the pre-bloom and early heading stages. For us that means that we can make the best hay from mid to late June. But typically, the weather is difficult to predict, with thunder showers blowing through that may, or may not, go around us. So we have developed a strategy for making good hay in a short weather window, a strategy that also helps us to improve our tired pastures.
The north hay field, which is not grazed, is primarily Timothy grass. The Clovers don't compete well in this field because it is low-lying and floods in the spring melt. Goldenrod is invading, and slowly out-competing the Timothy, and this field will need to be turned and re-sown to completely revitalize it. When our weather window broke this year, the Timothy was in the early heading stages. Actually the animals pick the Timothy heads out of the hay, the seeds would be high in protein. But there is still a high percentage of leaf compared to stalk in this early heading stage. About 20% of this field is scattered with clover, dandelion and vetch, making it a decent hay, but not high enough in protein to carry a lactating animal or weanlings.

We have two acres in this north field that were planted to grain last year. The grain came up with a self-sown understory of clover. After harvesting the grain, we left the clover to establish itself, and these two acres will provide us with the kind of high-protein hay we need for our lactating does. Again, the clover is at it's highest quality in the pre-bloom stage (meaning that the flower buds are just beginning to form), and fortunately, that is exactly when we were able to cut it.

Our strategy for making hay in short weather windows is to cut it early, while the crop is still light, but high quality, and to cut it high. We cut 6 to 8 inches above the ground, instead of the traditional 1 or 2 inches. What's left in the field is mostly stalk, the least palatable or nutritious portion of the plant, and the young growth. The stubble holds the cut hay above the ground, away from moisture, and allowing air flow underneath the windrow. The combination of a light crop and the added air-flow can cut a day or even two off of the drying period.

The benefit of leaving the stalk and young growth is earlier recovery of the fields. Since practicing this method we have noticed our pastures recover earlier and faster in the spring. The also recover quickly after haying, allowing the possibility of a light grazing, or even a second cut of hay in late July.

Actually the practice of cutting and drying herbs has taught me a lot about making good hay. When harvesting a herb, generally the practice is to cut no more than two-thirds of the plant. Similarly, herbs are harvested before flowering. And the highest quality dried herbs are dried quickly and exposed to as little moisture as possible.
We cut on Wednesday afternoon, there were warnings of thunder showers on Wednesday, but the sky cleared and the forecast was for a hot, windy day Thursday, Friday and Saturday were a bit cooler with part cloud, and Sunday called for a chance of showers with rain on Monday. If we got two good drying days in a row, we could comfortably bale Friday afternoon, but if the humidity rose, or with heavy dews, we would bale Saturday. The forecast looked promising, but when is the forecast ever right?

Well, we lucked out with no dew Wednesday night, and Thursday was a perfect drying day, 28C/82F, sunny and breezy. We let the top dry out Thursday, and again no dew Thursdays night. Although Friday morning dawned with a heavy cloud cover and forecast for showers Friday night, rain on Saturday. Oh the fickle spring weather! We raked the hay Friday morning, flipping the windrows to expose damp underside to the drying breezes, and hoped for a break in the clouds. It did break long enough to dry out the hay, but JUST dry enough to save. After a few hours of sun, the clouds once again advanced and we paced the field, testing the hay here and there, finding a few damp clumps, but overall, it was ready.

Hay that is ready to bale should be dry enough to hear it crinkle when you twist it. But it need not be so dry that the leaf crumbles at the touch, not oven dry. If it is too dry, the nutritious leaf will shatter in the baler and you will be left with stalk.

Another way to test the hay is to scrape the stalk. The field pictures didn't come out, so I took this one of some Alfalfa I'm drying for the tea cabinet. If the skin of the stalk peels back, it is dry enough to bale.

We baled Friday afternoon, only 48 hours after cutting, when the typical drying period for a heavy cut of hay is 3 to 4 or more days, a weather window impossible to find in our early summer. And as you can see, as we finished up, the clouds were thick, and it began to spit on us as we unloaded the wagon. Just in time. But it is some of the best hay we have ever made, and worlds apart from any hay we have been able to buy. We harvested 130 (40lb) bales from 4 acres, which is a pretty poor crop when compared to improved pastures. But each one of our bales compares in nutrition to two or three bales of the kind of hay we can buy locally, which are cut in late July and consist primarily of stalk, and only weigh about 25lbs.

We are certainly the talk of the town in the farming circle, they think we are crazy cutting so early and leaving so much stalk in the field! But we would also need twice the barn to store all that poor-quality hay. Most of the local square bales are cut for sale, not for use, and the primary reason for baling in late July or early August is to get as many bales off the field, therefore as much money off the field, as possible. Our hay is cut with a different motivation, and therefore uses different techniques. It would be nice if there were more out-of-the-box thinkers in rural areas to reintroduce fresh ideas and approaches to agrarian life.

16 June 2009

What to do when things go wrong?

Good planning, preparation and preventative measures are the best insurance of good health and success in the garden and in the barn. But, especially in the first years when the learning curve is steep, things do go wrong and disease, pests or parasites can spread quickly and reach a critical level surprisingly fast. The ability to assess the symptoms and diagnose the problem is crucial to being able to react within time to save the crop, flock or herd.

So what elements are necessary to being able to diagnose a problem or illness, especially when encountering it for the first time? An observant and knowledgeable gardener or animal husbander is generally the most qualified to diagnose a problem because that individual knows the history of the soil or animal, and is familiar with the expected state of health in her garden or herd. The subtle first symptoms of dis-ease provide the best opportunity to address a developing issue before it gets out of hand. In the garden, these symptoms will include discoloration, spots, holes, wilt, etc, and usually accompany a period of stress, including temperature extremes, dry soil, wet soil, mineral deficiency or other soil imbalance. With animals the first symptoms include lack of appetite, listlessness, dull eyes or coat, runny nose or eyes, change in stool consistency, drop in production, etc, and again usually accompany an external stressor such as change in diet, transportation or change of location within the farm (i.e. barn to pasture), temperature extremes, exposure, lack of access to fresh, clean water, isolation from the herd/flock, or introduction of un-quarantined animal to herd/flock. As with our own health, stress decreases immunity to disease or infestation.

When I observe one of these primary symptoms, my first priority is to apply a first-aid measure where appropriate, to relieve the immediate stress. These responses can range anywhere from watering a wilting crop to giving an animal a homeopathic treatment for fever. (Remember to take notes of the treatments you give, the quantity and the time applied so that you can assess the responses to treatments, and more importantly, repeat your successes in the future.) Once I have contained the situation as best as possible, and this may include removing diseased plants from the garden or isolating an animal from the herd/flock, I then begin to investigate the originating cause of these symptoms. This is where observation, knowledge and health records are put to the test. If you are an absolute novice then you will be particularly dependent on books, forums, websites and more experienced individuals to help you diagnose the problem, but every one of these situations is an opportunity to increase your knowledge, so pay attention and keep records.

Begin by making notes, in detail, of anything you notice as "out of the ordinary", and use all of your senses. In the garden this will mean noting not only the condition of the crop/plant, but also the condition of the soil, the condition of surrounding plants (including weeds), any insects you see in close proximity to the affected crop (don't forget to look at the insects at ground level or just below the soil), even a nearby soil disturbance can be a clue. I find a digital camera useful in identifying diseases or pests in the garden. In the herd or flock, these kinds of observations can be somewhat subjective, and not nearly as obvious. But from daily interaction with domestic animals you get to know each individual's particular habits, appetites and behaviors. An animal who usually meets you at the gate, but stays in the barn that morning, is not feeling well. When an animal lays down more than usual, or doesn't eat or drink quite as much or as readily, or doesn't vocalize as much as usual, or stays a bit apart from the other animals, that animal is more than likely showing primary symptoms of illness. The more obvious symptoms will include quantifiable differences in temperature, bodily fluids, discharges, loss of hair, skin eruptions, or drop in production levels. Again, use all of your senses, listen, smell, feel and watch (well, maybe not taste!), and take notes or pictures. And be sure to look for anything out of the ordinary in the yard, pasture or barn, anything the animal may have eaten or been exposed to.

Now that you have all of this observational data, it's time to hit the books, forums, your own records, or experienced individuals who are familiar with your own bio-regional conditions. Sometimes the cause of disease or infestation is obvious, and sometimes it takes a bit of investigation. More often than not, the problem is compound, not just a simple or primary cause, so I will give a few examples of conditions we have experienced this spring, one in the garden and one in the herd.

I chose this example, of diagnosing a problem in the garden, because it begins with generic symptoms that could point to any number of causes, and shows our process of elimination to reveal the root causes of the issue. About a week ago we noticed that our bush beans were a bit discolored. There was some yellowing along the veins of the leaf, and around the edges, and a few speckles of brown that we recognized as insect damage (which would be a secondary symptom, the insects being attracted to the plants sending out chemical signals of stress). The plants had slowed their growth, but were not wilting, curling or browning. This kind of discoloring usually points to a few possibilities: mineral deficiency (perhaps as result of pH imbalance), or some kind of leaf burn (UV, chemical, acid rain, frost). We could rule out a chemical burn and frost, but suspected acid rain and/or UV burn. We are in an area that receives a lot of acid rain, and we have been noticing more frequent warnings of high UVs in the weather forecasts. Three days prior to the appearance of the discolored bean leaves, we had a sunny day that rated 8 on the UV index, followed by two days of rain. After this, the beans did not look so good. There's not much we can do to protect against UV damage, but like a frost, if the plants survived the burn, they would recover. And we already do what we can to prevent over-acidification in our soil due to acid rain by applying limestone and adding humus. Calcium is also necessary for the soil to be able to maintain a neutral pH, and to prevent the soil nutrients from becoming chemically locked up as happens in acidic soil.

It seemed clear to us that our bean crop was suffering from a mineral deficiency, but the cause was still unclear. A mineral deficiency can be a problem inherent in the soil, meaning that a mineral is actually missing. Certain crops are more susceptible to certain deficiencies, but most likely, other legume crops would show similar symptoms, and the peas were unaffected. Or it can be a result of a pH imbalance, essentially making necessary minerals inaccessible to the plants. Or it can be a problem of the plant's metabolism, not being able to absorb the minerals in the soil, due to stressors such as temperature extremes or wet/dry soil. So besides the possible causes of UV burn and acid rain, (both of which, beans are sensitive to) we had also been experiencing a cool spring with overnight temperatures remaining below 10C (50F). Tropical plants like beans do not grow/metabolize below this temperature, so it could also be possible that the plants are simply too cold. But more than likely, the true cause is a combination of these factors.

As we watched the crop over the next few days, we also watched for similar signs in nearby crops, and other legumes. None appeared, and a section of the bean crop started to recover. We had put a hay-bale wind break around our transplanted tomatoes and peppers, as it had been cool. The row of beans on the other side of this wind break were looking green and beginning to grow again, before the rest of the crop. This was a sure sign that the cool overnight temperatures had played a major role in the slowed growth and discoloration of our bush beans. And as the temperatures finally begin to warm, the rest of the crop shows signs of recovery. Had we not taken the precautions of protecting our soil from acidification, a simple stressor such as cool nights could have been compounded, possibly causing a crop failure. This is why it is so important not to spare your efforts in keeping your soil healthy and balanced, much like your own immune system, so that your crops will be able to withstand the inevitable environmental stressors that occur throughout the growing season.

Again, I will choose an example of diagnosing a problem in the herd that is difficult to diagnose because of the vague symptoms and the range of possibilities they point to. Our goat herd consists of one milking doe, one meat doe (not lactating or pregnant), and two bucklings. Each of these animals has different dietary requirements, the lactating doe requiring the highest amount and quality of proteins and minerals, the bucklings requiring moderate levels to support growth, and the meat doe requiring the least, but a sufficient amount to put on weight. Likewise, our milking doe will be the animal in the herd to show signs of illness first, the bucklings second, and the meat doe being the most resistant because of the fewer demands placed on her system.

When spring broke and the goats were out on pasture, our milker started to put on more condition and began also to increase her production of milk. The whole herd showed signs of vigor and health, frisking about in the pasture. One fine spring day, while out in the garden, I watched Juniper (the meat doe), bleat and gallop, three-legged, back to the barn. She held up one of her hind legs as if it had been injured. Of course, the rest of the herd followed her in. I followed to the barn to investigate, but could not find anything wrong with her leg or foot, and she was walking just fine. Then I heard it, the drone of a Horsefly. Juniper heard it too, and again, raced for the barn. She had apparently been bit by one of these inch-and-a-half long prehistoric nightmares (which, by the way, may have been one of the contributing factors to the extinction of the dinosaurs). They take a pretty good chunk out, and it does hurt.

Penelope, who had already been spending more time in the barn to escape the blackflies and the mosquitoes, simply went on strike. She would not graze, at least not much, and not in the daytime. I assumed that she would be grazing at night, as this is what the horse and our milk cow always did. But she began to loose some of that condition, and dropped back down in milk production. So we cut some tree branches and picked buckets of raspberry leaves and evening primrose, some of her favorites that are not available in the pasture. She wasn't picking up, but she wasn't getting poorer, for two days. Then on the morning of the third day, she looked absolutely hollow, had not eaten any of the hay or forages brought into the barn, and her milk was nearly half of normal. She was listless, lethargic, breathing faster, stools were firmer and pelleted (instead of the normal softer stool of lactating animals on pasture), she was laying down in the sun, and had no appetite for grains or her favorite treats of raspberry leaves. Her lack of appetite, and absence of chewing cud told me that a good first-aid response would be to give her a homeopathic treatment for colic (it has a blend of a few ingredients used in digestive disorders). And to make sure that she has enough liquids, as dehydration would compound the issue. She responded well to a mixture of warm water, molasses and apple cider vinegar, about a tablespoon of molasses and 2 tablespoons cider vinegar for every Quart of water. I gave her as much as she would drink.

Next I hit the books, most useful to me are my homeopathic veterinary books. They give very good clinical descriptions of the illness and help me to accurately diagnose. Her symptoms matched up well with simple indigestion. Rapid breathing, sub-normal temperature (hence laying down in the sun on a hot day, when normally she would be laying in the shade), lack of appetite, listless, and the rumen would feel doughy and be inactive. I went back to the barn, and felt her rumen. It was indeed doughy, feeling like an under-kneeded ball of dough that does not spring back. There was no accumulation of gas, or tympany, which would make the rumen distended and sound hollow like a drum. This was at least good. Simple Indigestion, untreated, can compound into Acute Indigestion with toxemia (blood poisoning), or Bloat. I now had two priorities, to get Penelope's digestion working properly again, and to figure out what caused the indigestion so as not to repeat the conditions.

I felt the rumens in the rest of the herd, each feeling slightly doughy, but still somewhat active (meaning noticeable rumbling and movement in the digestive system). We watched them closely, and noticed one of the bucklings laying down, often in the sun, the next day. At noon, he was laying with his head on the ground, not a good sign. We got him up, gave him a half dose of the Colic remedy, and as much molasses, apple cider vinegar water as he would drink. He too responded well, but we were at the tipping point. If we did not get on top of this, it could easily develop into a critical stage and as I've learned from watching a healthy cow go down with milk fever, animals can deteriorate rapidly.

Penelope's appetite had responded to the treatments we gave her as a first-aid response, so we made sure she had high quality forages in front of her, in the barn, at all times. She was still on strike as to going out in the pasture, terrified by every buzzing insect (granted, she had a huge welt on one teat where a horsefly had bitten her, nasty buggers!). We scythed pasture, brambles, comfrey and primrose, and fed her in the manger. And kept up the molasses and apple cider vinegar. But we were also cautious as to what we fed her, as to avoid compounding the indigestion into bloat. Rich pastures heavy in clover can cause bloat, so we scythed mostly grassy pasture. And we were suspicious of the tree leaves, causing the indigestion. Earlier this spring, we had given them plenty of poplar, and some maple, but brought down some birch leaves on the day the horseflies came out. Was there something in the birch leaves, or something in young spring birch leaves, that is indigestible? Or was it the fact that they ate too many of the birch leaves, prefering the convenience of eating them, over going out on pasture amongst the bugs, therefore getting a high concentration of a chemical or toxin in the birch leaves, that would otherwise be harmless in small amounts?

This seemed to us the most likely cause of indigestion. So our next trip to the Internet Access Center included a session researching the toxicity of birch leaves, and indeed, there is a concentration of phenolic compounds in winter growth. These phenolic compounds have been found to depress or inhibit digestion in ruminants. See study here.

It is important to watch for signs of recovery in sick animals, if they are not responding to treatments, do not simply wait and hope they will get better eventually. If they do not respond, then most likely, the problem is not diagnosed properly, or the treatment is not being applied at the right level and frequency. Both Penelope and the buckling showed a quick response to treatments. Every dose of molasses, and apple cider vinegar, would stimulate their appetite, readily taking mouthfuls of forages instead of nibbling and nudging at the feed. The buckling's rumen was back to normal the next day, and he was resting in a cool corner of the barn at noon, chewing his cud. Penelope took a few days to recover, but each day looked less hollow, more active, had a more active appetite and rumen, and began to recover her milk production as well. On the third day since the illness she went out for a bit of a graze on the pasture, and a strong morning breeze blew the bugs away long enough for her to get a belly full. Now, a week since, the herd is back on pasture, but we still bring buckets of pasture, primrose and raspberry when the bugs are particularly thick, to the point of harassing the herd. Penelope is back up to a normal level of milk production, and putting condition back on. And we are keeping young birch leaves out of reach from now on.

It is much easier to research an appropriate treatment for a problem in the garden or the herd/flock once you understand the cause, or at the very least, can identify the symptoms. With these clues and bits of observation you can begin to diagnose the problem. Many remedies and treatments are easy to find and easy to apply, and most conditions, if not all, can be prevented in some measure. Do not neglect to research the preventative measure to avoid repeating the conditions in the future. But if you suspect or have identified a virulent pathogen or disease in your garden or herd/flock, do not hesitate to contact a professional (farmer, vet, agronomist), and maintain good hygiene to prevent spreading the disease.

02 June 2009

The fencing myth or Fencing the mythical beast

We read all the books and heard all the stories about how notorious goats are at getting out of fences, and into gardens. We were planning to tether the goats, and had a complicated system of portable shelters, tethers and rotations. But come early spring, there was hardly enough grass to warrant a tether, and no garden to break into, so we let the does graze with Pilgrim in the big pasture, and they generally respected the single wire electric fence we had up around the perimeter. So we decided to try a double wire electric fence and see how well the goats respect it, before the garden gets going.

First, we measured the goats. The top strand needs to be high enough to discourage jumping, and the bottom strand needs to be low enough to prevent crawling under, and the two strands need to be close enough to prevent climbing through. I won't give exact measurements, because this spacing would depend on the breed and height of your goats. With a mixed herd, including young kids, a three-strand electric wire fence may be better.

It worked out that we hung the top strand roughly at eye level of the does, with their heads up. This gives them a strong visual barrier, once they are trained to respect an electric fence. And it is high enough (about 3 1/2 feet) to discourage jumping over. The bottom strand was hung at about brisket level. When the does are on their knees, as they are wont to do when reaching under a fence, the bottom strand will contact their shoulders, so it is low enough to prevent crawling under. But being at brisket level, it would contact brisket and belly if trying to crawl through. And for the most unlikely feat of trying to leap through the fence, the top strand would contact with their backs. So two stands should do it...

But the other side of the equation is a good zap in the fence, and animals who are trained to respect that fence. Fortunately for us, I don't think the goats had been introduced to electric fencing. Animals will sense when an electric fence is shorting out, and will learn to ignore a light tingle on the way through to the elusive Other Side of the Fence. So a well maintained fence is as important as the spacing of the strands of wire.

Once the fence was up, we hooked up the fencer, and left the does to work it out, watching them for their reactions. You don't want to lead an animal up to a fence and "zap" them, they will associate the shock with you and not the fence. It was Juniper who first sniffed at the wire. Goats, like horses, are sensitive to electric fencing, and just one shock, once they figure out where it is coming from, should be enough to educate them. For Juniper, who is not the brightest button, and has more enthusiasm for adventure than her mother, it took two shocks. Just to be sure that it was the fence that bit her and not a bee. The first one made her jump and buck around, not sure where it came from. The second one made her jump back and take a double-take at the fence, this time sure. Penelope, wisely learned by observing, and I have never seen her touch the fence.

Another test came when we incorporated the 3 month old kids into the grazing herd. The lower strand was at shoulder height for them, and should keep them in as well. Again, we let them out into the pasture and generally walked over to the fence line, since they still follow me around, and let them sniff the fence out for themselves. They each got a shock, right on the nose, and have never wandered too close to the fence line since.


27 May 2009

Writing a new story on the land

Our pastures are pretty tired. Before we started renting, they had been cut for hay, but not grazed or amended, for 20 years. The last time they were turned for agriculture purposes, they were planted into Brussels Sprouts and farmed with the usual heavy use of chemicals Brassicas receive. The farming venture only lasted a few years, then the fields were sown to Timothy and Red Clover and annually cut for hay. When we turned the first bit of sod for a garden, we could read the story of abuse and neglect in the soil. And we could read the same story in the pastures as the grass and clover reluctantly and without vigor, push through the moss and race to send up seeds. So we are writing a new story on the land.
In our first Fall on this land, we ploughed and worked up about three acres of the poorest pasture, areas that were overtaken by Goldenrod. We planted Rye that fall, and Wheat and Oats the following spring, as well as a half-acre of improved pasture. The mix included Perennial Ryegrass, Fescue, Timothy and Alsike Clover. Last summer, we let it grow and go to seed, and this spring it is out-doing the rest. It is thicker, greener and more vigorous, and we plan to cut it for hay this summer, as it will make a fine, leafy, nutritious hay for does in lactation and kids, in comparison to the stalkier hay in the tired pastures.

Our organic grain fields came up with a self-sown understory of red clover last summer. It did not bother the grain crops, and we had no problem harvesting the grains. Instead of being a "weed problem", it was beneficial, keeping the soil moist and loose, and providing a cover crop after harvest. We turned some new ground last fall, for grains this summer, so instead of turning the old grain fields under and planting them down to pasture, we decided to leave them come up in Red Clover and either graze or cut for hay this summer. This picture is of the Rye field we harvested last fall, with the old stalks intact. The cover crop of Red Clover overwintered, and to our surprise, the bits of Rye we left behind after harvest self-seeded this spring. We plan to cut this for hay as well, and would be able to graze it in the late fall as well.

Here is the emerging Oat field this spring, I just love looking out at our grain fields around us, they are a beautiful crop.

The same sad story of abuse and neglect can be read in the forest on this land. Again, it was clear-cut 20 years ago, and left to re-grow into a thick mass of tangled pioneer species. At this stage in it's growth, it is primarily young Poplar and Fir (80% of which is standing-dead or dying with dry-rot from overcrowding), with scattered young Maple, Birch, Spruce, Pine, and Ash. We burn a lot of Poplar, thinning out the crowded trees to make room for the hardwoods and longer-living Red and White Pines that used to dominate this area. In the process of cutting a logging road into the woods, we get a few cords of summer cord wood. Poplar is actually a great summer wood because it leaves no coals behind, allowing the stove, and the house, to cool down after the morning's cooking fire.

It take a lot of work to re-write the story in this land, but each spring we return to the thinned and tended forest, amazed at how the maples and birch seem to have doubled in size. Our new story is a story of rejuvenation.

20 May 2009

For those aching muscles

Coming out of winter, and into the physical work of preparing ground, planting and weeding in the spring garden, we use muscles that lay dormant all winter. After the long dark, it feels great to be working outside and using all those muscles again. But they do sometimes ache at the end of a particularly productive day.

I have been slowly starting a medicinal herb garden, so this spring, I have some herbs to make my first herbal remedies, other than teas, teas, teas.

Comfrey Salve

Comfrey Liniment

I looked through my herbal books for what to use on sore muscles. Really, sore muscles need rest, but there is also tissue to heal, inflammation to reduce, and pain to relieve. Comfrey does the job very well of aiding the healing of muscles, as well as bones. Mullein can help reduce swelling, and relieve joint pain. Mint is a muscle relaxant, as well as having a pleasing aroma. Rosemary reduces inflammation. And Clove relieves pain. Sounds good to me.

To make the salve I started with a base of 8 ounces high-quality home rendered lard (although most prefer to use high quality olive oil or other vegetable oil). While the lard warmed on the stove, I finely chopped 1 1/2 ounces fresh Comfrey leaf, 1/2 ounce fresh Mullein leaf, 1/2 ounce fresh Mint leaf, and added the fresh herbs to the oil, along a heaping tablespoon dried Rosemary, and a dozen whole Cloves. To release the volatile oils of the herbs, mash the herbs with the back of a spoon every few minutes, and keep the pot covered in between, so that the oils do not escape. Keep a close eye on the hot oil, and gently cook it over a low heat for two hours. Cover and let cool for 8 hours. In the case of vegetable oil, you will be able to filter the herbs through a muslin cloth, being sure to squeeze every last drop of oil from the herbs. In the case of lard, re-melt the fat, just to the liquid stage, then filter as above into a wide mouth half-pint glass jar. In the case of vegetable oil, re-heat the filtered oil to 150 degrees Fahrenheit, and add 1/2 ounce of melted beeswax, stir well, and pour into your jar. The salve is ready to use as soon as it has cooled. Massage it well into the skin for deep tissue relief. It provides relief for about 6 hours, and can be applied 3 or more times a day. For extra pain relief, we use it in combination with Arnica cream.


8 ounces of fresh herbs were used to make the liniment. I used 5 ounces finely chopped Comfrey leaf, 2 ounces finely chopped Mullein leaf, and 1 ounce finely chopped Mint. Place the herbs in a jar with a well-fitting lid (like a wide mouth quart mason jar), and fill just to cover with Apple Cider Vinegar, about 1 1/2 cups. Liniments can also be made with alcohol, but Apple Cider vinegar has it's own benefits for sore or fatigued muscles. It is basically a herb vinegar, allowing the herbs to soak in the vinegar for at least a week, or up to a month. Place the jar in a dark place, like a cupboard or cabinet where the temperature will be consistent, and shake the jar vigorously twice a day. When you are ready to use your liniment, filter the herbs, and if desired, add a tablespoon of vegetable oil for a softer, massage oil consistency. If you add the oil, be sure to shake the liniment before each use. We use the liniment as a preventative, before doing heavy work or exercise. Apply it directly to the major muscle groups and rub it into the skin, it absorbs quickly. It also provides a more instant relief to sore muscles, working in combination with the deep tissue salve to rejuvenate and regenerate sore, strained muscles.

21 January 2009

The importance of keeping records

Why keep records:
I began keeping milking records in the summer of 2005, when we bought our first Jersey cow. A few home dairying books had recommended keeping milk yield records, along with heat cycles and breeding dates, as an important aspect of keeping a cow. So I started to note twice-daily milking records on a calendar, and within a few months I began to see the lactation curve of my own cow, and could compare it with the yields of other Jersey cows, making it obvious to me that we had a good milker. That is an evaluation I would not have been able to conclude without having kept records.

Mr. Fritillary, with his own farming experience, encouraged me to continue keeping records, especially around feeding and health in the barnyard, and diseases or pests in the garden, as a way to apply myself to the study of animal husbandry and gardening. As I began to take more responsibility for our own health, along with the health of our flocks and soils, I began to treat my daily activities as a Masters course in homesteading. I began to apply myself to my own education, and kept records as an objective way to evaluate my own progress, and correct my mistakes. These records have also become a valuable tool for planning and setting goals.

Not knowing what information would be valuable, I began a habit of recording all kinds of information: daily temperature highs and lows, precipitation, sun, wind. Along with these daily records, I also kept close records on single events, like my first experience diagnosing and treating mastitis, writing down details about the symptoms as well as our homeopathic treatments, so that I could look back and evaluate what worked well, and what could have been done better or sooner.

Keeping records is like planting a tree, the best time to begin is always ten years ago. The value of keeping records grows with time, because they begin to reveal patterns within the circular events of revolving seasons of weather and birth/death. And by going over the data, looking for these patterns, I have been able to hone and develop important homesteading skills like observation, attention to detail, organization, and the ability to see a few steps ahead. Paying attention to our micro-climate, and the way our plants and animals respond to these conditions, will be a valuable tool in preparing for an otherwise unpredictable changing climate.

I now keep records in these categories: climate, ecology, garden, husbandry, and home economy. At the end of a month or a year I can evaluate how well we have done, and make adjustments to where we focus our efforts, and even adjust our long-term goals. Our "big plan" has changed dramatically over the three years that we have truly been homesteading. When we set out, we thought we needed 100 acres, including woods, to live by our own means, but we now know that we can do quite well on 10. The kind of intensive record keeping may sound a bit over-kill for urban gardens, or small homesteads, but I believe it is the opposite. The more limited your space, the more attention to detail you need, in order to make good use of everything you've got.

What to record, and how to use the data:
CLIMATE: I record the daily high and low temperature, precipitation, and weather events like hurricanes, hail, damaging wind. I also record the amount of sun we see each day, and days when the wind blows consistently over 15mph. This is valuable if you are looking at investing in solar or wind power. It was easy for us to discover that we do not have a reliable source of wind power here, and that solar power is only moderate, and is the kind of investment that would only just pay for itself, if at all. By comparison, every book and website on alternative energy said that our area is one of the best for wind, and over-estimates the amount of solar energy, but these numbers are based on averages over a large area, and cannot reveal the variety of micro-climates. These general observations also do not take into account climate change and airplane flight paths *link*. In recording our own data, I don't worry about exact numbers, I just mark whether we have full sun, half sun or part sun/cloud, days with less than 2 hours of sunlight I consider to be no sun. The way that I interpret the data at the end of the month is to add it up: 1 for full sun, 1/2 for half sun, 1/4 for part sun/cloud, usually adding up to between 8-14 cumulative days of sun in a month. For the solar panel, I would then calculate the number of hours of sunlight by looking in an almanac for the length of daylight, i.e. if there are 12 hours of daylight in April, and 10 cumulative days of sun, then we got 120 hours of sunlight. You can then multiply that number by the power output of a solar panel (using 50% of the continuous amperage output has been the most accurate number), and calculate how much power you would actually get out of a solar panel. With these kinds of specific numbers, you would be able to make an informed decision about whether it is a worthwhile investment, or whether you should look into other sources of power, including purchasing green power. I still keep records on the length of sunshine because it has proved valuable data for the garden and egg production.

I also work out the weekly and monthly averages for temperature, and monthly and yearly precipitation data. In this way I have been able to see our own weather patterns, I know to expect a melt in the first week of January, and to expect a deep-freeze in the third week of January. I can look back at March temperatures when planning a greenhouse for starting seeds, or building kidding pens. I also start to learn the extreme ends of the temperature and precipitation scale, which helps us select seed varieties or breeds.

ECOLOGY: I keep records of frost dates, the day the leaves bud, and the week they turn color, the day all the dandelions bloom, the day all the red clover blooms (these bloom dates would prove valuable for beekeeping), I record bird migrations, and the day the mosquitoes come out in clouds, the night the peepers start singing, and the day I see the first wild bees. Some of these records help me to keep an eye on how climate change is affecting our local area. But the migrating birds and bats also play a role in our gardens and fields, as predators for our main insect pests. Mosquitoes, blackflies and horseflies can be a major hindrance to outside work, and grazing animals. By keeping these records, we can be sure to have certain outside jobs done, avoiding the few weeks of intensive breeding and feeding for each insect species. For two years straight, the blackflies have come out in full force on a Wednesday, in the third week of May, not the same date, but exactly the same day of the year. The mosquitoes as well, are fully out on a Friday, either the last of May or the first one of June. I did not expect that kind of precision in the insect world, but now that I know, I try to get the garden planted before the blackflies come out, and we finish fencing and spring firewood before the mosquitoes come out. I also keep track of wild crops that I like to harvest, fiddleheads, red clover, hops, pin cherries, apples, blueberries so that I know when and where to look for them.

GARDEN: I keep close records of planting dates for each crop, as well as the date of emergence so that I can evaluate the germination vigor of my seed. Fruiting dates, meaning the first mature peas or beans, etc, or the first green tomatoes, cross referenced with the temperature averages can reveal whether we are starting our tomatoes early or late. Crop harvests cross referenced with planted row feet, will give you an indication of yield, in order to be efficient with garden space and compost, and be more precise in meeting your needs. Generic yield numbers can be found in gardening books, but they can vary widely, it is more valuable to know specifically how a certain variety produces in your soil and climate. In this way, from year to year, you can evaluate gardening techniques, soil amendments and varieties, whether they improve your crops or invite pests and disease. I record not only the frost date, but the exact temperature, and how each type of crop was affected, so that I know the frost hardiness of each crop. Pests and diseases also arrive with clockwork regularity, I know when to expect potato beetles and cucumber beetles, and that larvae begin hatching 21 days from the day I see the first adult beetle, this gives me time to prepare, and to watch for beneficials. I am also getting to know when soil diseases like potato blight appear, and when root maggots begin to damage carrots, in this way, I can adjust planting dates, and I know when to harvest the crop for root cellaring, instead of just leaving it in the ground as long as possible. I also record the appearance of any beneficials in the garden: toads, insect-eating snakes, bats, birds, insect-eating voles, and predatory insects. In this way I am becoming familiar with my garden ecology and how to encourage the beneficials. I also keep close records on seed saving. Cross-referencing the garden data with the climate data gives me a lot of important information on how to use the local climate as an advantage in the garden, for example, if I know the hottest week of the year, and the days to maturity of each crop, I can plant the cold crops like peas and lettuce to finish by that week, and I can start the peppers and tomatoes to take the best advantage of that heat. The most valuable tool I am building with this garden data is a planning calendar, organizing each job in the season, and allowing me to see at a glance what needs to be done each week.

ANIMAL HUSBANDRY: Records on yields, whether milk, eggs, or meat, helps us choose breeds for our specific conditions, and evaluate the performance of individual animals, which is necessary for making decisions about which animals to breed or cull. Notes describing the growth, health and condition of our animals, in different seasons or stages in pregnancy and lactation, are especially important in selecting animals for breeding. And keeping records on the amount, variety, and protein of feeds, cross referenced with production and health records, reveals performance, along with helping us plan the amount and type of grain and fodder crops to plant. I also make note of the first day our animals are on pasture, and likewise in the fall, the first day we begin supplementing fading pastures with hay. Recording as well, how much hay we feed out in a year, for each type of animal. Illness and disease, especially in breeding or dairy animals, must be closely attended and recorded. We use homeopathics and herbal remedies, with much success, but these methods are dependent on close observation and catching symptoms early, which is aided by records on appetite and production yields during a state of health. Any deviation from the norm alerts me to the possibility of illness.

HOME ECONOMY: This category includes basic budgeting information, income and expenses. I have found it to be valuable to categorize our expenses, so that I can see where we are spending our money, and therefore, where and how to focus our efforts to reduce our expenses. But it also includes a close account of our pantry. When we get the final harvest numbers, I write out a food budget. I work out how long we need a certain food to last, and then I can see how much we can use in a month. That way I can plan my meals in a way that takes best advantage of the seasonal food, and make sure that we do not run out of an important food group like green vegetables or tomatoes (a good source of Vitamin C in the winter). In this way, I have also learned how much food of each type of food we need to put away each year, so that we can plan the next garden in a way that nourishes us well. Likewise I record storage qualities of varieties in the root cellar.

Homesteading is, in part, an art of living well, within limits, and finding a balance of scale that does not put too much stress on any one part, at the cost of other aspects. Recording this kind of data I've described is a simple chore, one that becomes routine by habit. But the true value of this data has to be brought out, like polishing it to a shine. By intelligently interpreting the simple data, any gardener or homesteader can create their own "how to" book that applies specifically to their own conditions. As you begin to keep records, you will be able to see for yourself what kinds of records are useful for your home, barn and garden. It removes the guess work, under-estimations, and costly surpluses that can discourage, or even defeat, the good intention of growing your own food.

09 January 2009

Tally up for 2008

It is almost impossible to equate the products from our homestead to the purchased "equivalent", especially when it comes to food. Likewise, it is nearly impossible to compare the quality of life and health we experience at home, on our homestead, to the "quality of life" as measured by income and assets. But still, I thought it would be an interesting exercise to calculate the market equivalent of what we produced at home, for our own use. I did not include anything that we produced for income or barter.

The categories are similar to the harvest notes on the right-hand sidebar of this blog. I did my best not to double up, for instance, I priced out the green beans as fresh, and did not count them again in the pantry as canned beans. But for things like wild pin-cherry fruit leather, I priced out the fruit leather, not the fresh fruit. I used organic market prices for 2008, wherever I could find price lists on the net.

I'm pretty impressed with the total, especially with the knowledge that it will be a higher number next year, if all goes well in the garden and fields. Of course, producing this much at home, keeps us close to home, and with such a variety of crops, each requiring time out of the season, it limits our ability to grow "cash crops." But at the same time it decreases the amount of cash we need to earn. For those who are curious, we keep our basic cost of living at around $2000 a year, including utilities, food, transportation, household purchases, and farm purchases: we live simply, but not without comfort. This does not include investments in equipment or one time purchases like the solar panel, etc. This is a sum we are quite capable of producing out of the garden and selling locally, without restricting our ability to produce high-quality products for ourselves. It also makes us pretty invulnerable to changes in the economic and employment climate.


Vegetables Harvested 2008 (Including fresh fruit)
TOTAL $4752.60

Staples 2008 (Dairy, eggs, meat and grains for the kitchen)
TOTAL $7898

In the Pantry 2008 (Including dried or preserved fruit, soap, vinegar etc. But preserved veg and pickles are not counted twice, they are priced as fresh vegetables)
TOTAL $1050.50

Saved Seed 2008 (Including grains and potatoes)
TOTAL $823

Herbs and Teas 2008 (dried only, fresh herbs included in vegetables)
TOTAL $296.65

Animal Feed 2008 (Grains, hay, mangles)
TOTAL $2675

Wood (firewood and chainsawn lumber)
TOTAL $2000

Grand Total
$19,495.75

02 January 2009

Goals for 2009

2009 is going to be a rough year for most, I hope that it draws together communities and families, to take care of each other. I hope it clears our collective eyes of all the clutter, and reminds us of what is really important: a possible future for the children on this planet, and food, shelter, dignity and peace for every human.

The end of December and the beginning of January are always the slow weeks for us. It is dark and cold, and we are recovering from the busy growing season. This time is necessary for us to regenerate and reinvigorate.
The fierce feline hunters cuddle up to Blackie in his box, some mornings the little grey one is actually sleeping on Blackie's back.

The rest of the winter gives us some time to focus on interests outside of gardening and homesteading, as well as time to plan for the upcoming season. I love to plan out the garden and make plans for the livestock we keep. Mr. Fritillary takes on the larger homesteading "systems" like our power system, or growing/harvesting/threshing grains.

Our goals in the garden are to continue expanding our small grain and pulse production. For cereals, along with wheat, we are also going to grow a crop of hulless oats and spelt. And our pulse crops will include a larger crop of baking beans and dry peas, as well as chickpeas and lentils. I want to try quinoa again, our crop in 2008 failed to produce seed in time for the frost, but we had an early severe frost this fall. After seeing how frost tolerant it is, I will plant at least a week earlier in the spring as well.

The additions in the vegetable garden are minimal, a new variety of pole bean, and paprika peppers. The rest will be just about the same, but I would like to grow more cabbage, sweet potatoes, beets and parsnips. I hope to improve the yield in my onion crop by amending the soil with potassium (from wood ashes). I lost my ground cherry crop to the frost last fall, not a single ripe one, but they struggled to germinate in the spring and I knew they were a bit late. I may have to begin again with purchasing seed since the germination rate of my saved seed was so low.

In the herb garden I'll be adding a few new medicinals, as well as allocating more space for culinary herbs. I am determined to get some fennel seed, I started some indoors last spring, but not early enough I suppose.

And I will be doing more seed saving, especially with the biennials. I have some turnips, beets, carrots, mangles, and onions in storage to be planted for seed in the spring. I also have one cabbage in storage, pulled with the root ball and all, to replant in spring for seed. I left some parsley in the ground to go to seed in the spring, and I mulched over a row of chard and kale hoping it will make it through winter to produce seed in the spring. I am also going to start a lettuce seed bed as early in the spring as possible. Lettuce and radish are long season seed producers, and this fall I lost my radish and the larger part of my lettuce seed crops to the frost.

We are also expanding our variety of grain and fodder crops for the livestock in 2009. Along with wheat and oats, we are planning to grow peas for grain and hay, for both the chickens and goats. Millet, amaranth and sunflower for the chickens. And more mangles for the goats and rabbits.

Our plans for livestock are to keep our two does, and possibly get two ewes, and 2 or 3 doe rabbits in the fall. We will be looking for some ducks in the spring, hopefully some duck eggs to incubate ourselves, somewhere between 12-20. We will also be breeding our young flock of hens and either incubating the eggs or letting a clucky hen hatch them out herself. Going into winter next year we will keep the flock down to 6 hens and a rooster and 6 ducks and a drake.

Our other major project for 2009, Mr. Fritillary's terrain, is to design/build a bicycle generator and/or a horse-powered treadmill (literally a treadmill for the horse), to replace our gas-powered generator. We spent $400 on gas in 2008 (at an average of $1.15 per Liter), $300 in 2007, and we could make one or both of these generators for about that much. The horse treadmill is a bit more complex to build, but it would truly replace the gas generator, producing an equivalent amount of power, and it would give Pilgrim, our standard bred workhorse, something to do in the winter. He actually gets bored and cramped in by the deep snow, and would be a happier, healthier horse for the exercise.

It seems to me that Pilgrim remembers being cramped up by the barn due to the 4-5 feet of snow on the ground through most of last winter, so every time it snows it is as if he is out getting one last romp around the fields.

I have really enjoyed starting this blog, and beginning to build an online community, and will continue to write about our experiences and experiments with homesteading in a brave new world.

05 December 2008

Well, don't literally put the fridge in the ditch just yet...

For a bit more motivation on the Ditch the Fridge Challenge, I will tell you all of the wonderful uses we have found for our defunct fridge and freezer...

The first fabulous use of the freezer was as a chick brooder. We turned the freezer on it's side, so that the door opened like a hatch, and the largest surface area (the side of the freezer) was now floor space for the chicks. We laid down cardboard and some coarse sawdust, installed a light bulb on the ceiling (after snipping the electrical cord to the freezer, and re-using it to splice on a light fixture). And screwed in an eye-hook on the door, and a latch, that holds the freezer door open just a bit to allow ventilation. For the first few days the chicks needed supplementary heat. We use hot water to radiate heat. I made a slip pillow to put around a 5 gallon bucket (any bucket, or pot, with a tight fitting lid that fits inside the freezer, and will not be needed again in the house, will work). The pillow around the bucket keeps the chicks from burning their selves as they warm themselves against the bucket, the same as they would under a heat-lamp. For about a week I refreshed the bucket with not quite boiling water, just to the steaming and tiny bubble phase, twice a day. As early in the morning as I could, and as late in the evening, to keep them warm over night. We had a thermometer in there and it kept at a pretty consistent 30-32C. Watching to make sure that it doesn't get too warm when a fresh bucket is installed, in which case I would open the door a bit more, and close it again when it stabilized. After a week, the chicks started making their own heat, and as the freezer is designed as an excellent insulator, their own heat was radiated back to them, and the hot water buckets were no longer needed. At two weeks I had the door open about 6 inches during the day, with a clear plastic window to keep them from hopping out, installed like a child's barrier 3/4 of the height of the opening, again to allow ventilation. By the end of three weeks, the chicks were gradually exposed to outside temperatures, and ready to be moved out of the brooder.
Encouraged by our success with the brooder, we tried it as an incubator. It was a bit harder to keep it up at 37-39C than it is to keep it at 30C, meaning boiling water changed more often. I also made the latch to close the door tight to hold heat well, and taped small sticks around what would be the top edge of the freezer, so that when the lid was closed, the rubber seal around the lid was held out enough to make ventilation gaps. And by moving the freezer-incubator to a part of the house where the temperatures fluctuates less, we were able to incubate eggs without power! The best part about using hot water as a heat source is that it is also a source of humidity. The humidity meter read at a constant 50-60%.

Now for the fridge, when we moved the young chicks outdoors, they still needed a warm place to huddle at night, so we put the fridge on it's side and took off the door. By propping the door against the fridge so that it covered 3/4 of the opening, and just left a gap for the chicks to go in and out, we had a cozy little spot for the larger chicks to keep warm at night.

Now the fridge has been measured and evaluated as a kid box. For the first two weeks of the kid's life, they cannot produce their own heat very well, and need an insulated box to keep warm. Our fridge was a small model, and is not quite adequate, but if it were a full size fridge, it would work very well as an insulated hidy-hoe for kids and lambs.

They also make convenient storage containers for potting soil or as instant raised beds for urban potato growers, etc (You will just have to work out the drainage issue). And in spring can be used as cold frames for transplants. With glass or plastic over the top, and the lid off in the daytime, they will keep plants insulated, holding the heat from the sun like a greenhouse. Just put the lid on at night to keep the frost out. Of course you can also add coffee cans or plastic bottles of hot water at night and on cloudy days to keep them growing.

Or the fridge/freezer can be turned into a big sophisticated version of my camp cooler, with a small pump running cold well water into the basin, and an overflow pipe running water away, to keep your perishables fresh.

Any other ideas?

So next time you see a defunct fridge or freezer in the ditch on big-garbage day, and you have already used up all of your own fridges and freezers for various brooders and cold-frames, you can rescue even more from landfill. And you get a free extension cord thrown into the bargain.

18 November 2008

Some of the little things

We do the best we can to live according to our conscience, here on our homestead. And living within limited means dictates some of our less-than-ideal choices. We are always making choices, and usually making small sacrifices, to find a way to live conscientiously: to responsibly manage our time, our physical and mental energy, the natural resources on our homestead and in our community, and of course, our limited cashflow. We set priorities for the necessities, and make long term plans to meet wider goals. Most everything our society takes for granted is largely destructive at it's root: our electric grid, food system, transportation, and production/consumption cycle. We have made those large lifestyle changes to address the bulwark of our concerns, reducing our power consumption to a level we could affordably produce with renewable energy, growing most of our food, living car-free out in the country by sharing rides and organizing monthly town trips, and for the rest either going without or buying responsibly.

For most things, we prefer to buy second hand, for small appliances often times older models have higher quality manufacturing. I picked up this table top sewing machine for $5, in great condition. All of our clothes are second hand, there's just too much used clothing out there, in perfect condition, and with a sewing machine just about anything can be made to fit. I also love to knit, and am a novice spinner, so our hats, gloves, scarves, and even undergarments, are homemade. And will one day, be made from homegrown fiber.
But I don't knit socks anymore. It's not that I don't like to, it is just that they ware out too fast for the amount of time I put into knitting them, and the cost of the wool. A hand-knit pair of socks costs $3 and about 3 hours, and usually only last a month. But store bought socks, or the pitiful collection of thin cotton socks in the second hand bin, just don't cut it for our winters. And my dear husband certainly deserves good winter socks, he is the one usually doing any unpleasant work outside in cold weather, while I am inside the warm house baking and well, knitting. So I would knit socks regardless, if we hadn't come up with an acceptable alternative.

Our local second hand clothing shop has an under-utilized abundant resource of out-of-fashion wool ski sweaters. These sweaters are tightly knit and make a very durable and warm fabric, perfect for socks. One large man's sweater will make about three pairs of knee-high socks, costing maybe 25 cents and 10 minutes a pair, and lasting about six months. Use the waist and wrist edges as the top of the sock, depending on the particular sweater, either cut out two strips between 5-6 inches wide, the full length of the sweater, or one 10-12 inch block. With the fabric inside out, sew up the seam or seams on the sides of the sock, rounding the toe. The sleeves usually make a shorter pair of socks.

Make your seams thin, and go over it twice with a small stitch to reinforce the seam, or if you have a machine that reinforces edges, use the appropriate stitch.

And voila! Great winter socks.

10 November 2008

A Goat's Economy

This is what we get these days. We no longer get showers. When it rains, it really rains. Twice we have gotten a wheelbarrow of water in 24 hours, at least 5 inches of rain, only ten days apart. The Climate Change models for our area are proving true. I am not sure how much this would be, if it were snow instead of rain! But the forecast both times predicted 1/2 to 1 inch of rain, not 5 inches, which is I think, the result of funding cuts to local weather stations.

This kind of rain keeps me pretty close to the house, and I have been reading up on goats. Our goat-tending neighbor down the road dropped off his goat library, five titles in all, touching on all issues related to goat care and farming. One book in particular has caught my interest, Goat Husbandry by David Mackenzie. In the first few chapters he details the reasons why goats have never fit well with industrialized farming. Goats have always been the cornerstone of subsistence farming, especially those pushed to marginal farmland. I was amazed to read our story echoed in his pages, a story centuries old, of subsistence farmers who tried to raise a family milk cow on marginal land, as a way to try and feed the family as well as raise a supplemental income. More often than not, the needs of the cow would push them into debt, and the needs of milk on the table and cream for income, would deprive the calf of the only protein rich food available, stunting the calf, and further jeprodizing the family's ability to get out of debt.

So I am exploring what it means to be a subsistence farmer, and how subsistence farming works within a community. Our ideals of farming have changed dramatically since we began our adventure. We used to think of our ideal farmstock as consisting of cows, pigs and chickens, with heavy draft horse breeds providing for the extensive amount of grain cultivation and hay necessary to maintain the stock. These animals in particular fit well into industrial or market economies. We are now transitioning to goats, sheep, rabbits and ducks, using only standard horse breeds or possibly draft ponies for the relatively small grain and cultivation needs. Goats, rabbits and ducks (with the exception of sheep), have never fit well into the traditional market farm economy, but are relics of a still older, and perhaps more stable, subsistence farm economy.

23 October 2008

New batch of Apple Cider Vinegar

It is time to start this year's batch of apple cider vinegar. We used up the first harvest of early, unbruised apples for drying and preserving. By the second week of October, most of the apples had fallen to the ground, making for easy collecting in these unpruned wild trees. We went back to the abandoned apple orchard in the neighboring forest and collected the last of this year's apples. One of the trees produces small red apples with good flavor, these will be my cider apples. Late apples make good cider because of the high sugar content.

Last year was my first try at making vinegar. Not only was it easy, but the vinegar beat anything I had ever tasted, including the organic raw apple cider vinegar from the health food store. So I am doubling my batch this year, 12 quarts.

What do I use all of this apple cider vinegar for? It does make a great gift, and of course it makes delicious salad dressing. I also use it to make a hot cider tea in the winter: 1 Tbsp cider vinegar, 1 Tbsp honey, dash of cinnamon, nutmeg, cardamom (use your tastebuds), fill the mug with steaming water. But I also have a few recipes that have become favorites. I call it Faux Kraut, but if anyone comes up with a better name, let me know...

4 lbs root vegetables grated (turnip, carrot, parsnip in any combination, or singly)
1 lb onion chopped
1 lb sweet potato diced (if available)
Heat in heavy bottomed pot with about 1/4 cup oil or butter
Sautee onions, then add vegetables, stir to dress evenly with oil or butter
Add 1/4 cup apple cider vinegar
2 Tbsp honey
1 cup Applesauce or diced apples or 1/4 cup dried apples chopped fine
1 tsp carraway seed, 1 tsp dill seed, 1 1/2 tsp mustard seed, salt and pepper to taste
optional: 2 Tbsp pumpkin seed (or other seed or nut)
Remove to low heat until cooked through
Serve with meatballs, dumplings or sausage.

For a simpler variation, I love julianned carrots (or other root veg), steamed in equal parts cider vinegar and water (enough to prevent burning), and honey to taste.


This is the last of 2007's apple cider vinegar, with the mother at the bottom. It may come in handy later in the vinegar making process.
For making cider, I don't bother to core or peel the apples. I cut out large bruises, and remove the stems because they clog my juicer. I simply cut the apples into a size that easily fits in my juicer. It is a great way to use up all of the small apples that would be tedious to core and peel. This is a second hand juicer I piced up for $2. So you don't need any kind of professional equipment to get the job done. A cider press would definately sqeeze more juice out of the pulp, but for small batch vinegar making it wouldn't make much sense to invest in a large press that would be used once a year. One pound of apples makes about one cup of juice. Half of the juice evaporates in the vinegar process, so 2 quarts of apple juice makes 1 quart cider vinegar. You can also make vinegar from purchased unpasturized apple juice (or any unpasturized juice for that matter).
These ceramic crocks work great, but any glass jar will do. The juice is covered with a clean towel and placed in a warm spot, a sunny window or near my wood stove, about 80F is ideal. 60-70F will do, just slows the process down. (The same principles apply for rising yeast breads).
The sugars are turning into alcohol with the help of yeast. I have plenty of wild yeast in my kitchen from bread baking, and the juice begins to ferment and bubble within 24 hours. Once a day for a few weeks I skim the surface. Mold will form on the scum if not removed and spoil the batch. The cider has a pleasant, slightly alcoholic aroma, and I usually sneak a taste of the hard cider before it becomes vinegar.

Within a few weeks there is no scum to remove, and no bubbles rise when stirred. At this point, the alcohol is turning to acetic acid (vinegar), with the help of another microscopic beastie. Some recipes recommend adding "mother of vinegar" to aid the fermentation. Mother is the cloudy precipitation at the bottom of raw vinegars, Braggs or Eden brands contain mother. But it may be that the store bought vinegar affects the flavor of my homemade vinegar. So last year, I waited to see if it would form it's own mother when left undisturbed. And slowly, a thin grey film formed on the surface, almost like an oil slick. I left it be for a few weeks, then began to taste it for strength. When it tasted right to me, I filtered it and stored it in bottles in my cool, dark pantry. I began to use it right away, but after a few months, the flavor mellowed and became more complex. Like a good wine it improved with age.

Can't wait to find out how this year's batch tastes. For more detailed instructions on vinegar making, and using vinegar, The Vinegar Man is my favorite site.