27 May 2009

Writing a new story on the land

Our pastures are pretty tired. Before we started renting, they had been cut for hay, but not grazed or amended, for 20 years. The last time they were turned for agriculture purposes, they were planted into Brussels Sprouts and farmed with the usual heavy use of chemicals Brassicas receive. The farming venture only lasted a few years, then the fields were sown to Timothy and Red Clover and annually cut for hay. When we turned the first bit of sod for a garden, we could read the story of abuse and neglect in the soil. And we could read the same story in the pastures as the grass and clover reluctantly and without vigor, push through the moss and race to send up seeds. So we are writing a new story on the land.
In our first Fall on this land, we ploughed and worked up about three acres of the poorest pasture, areas that were overtaken by Goldenrod. We planted Rye that fall, and Wheat and Oats the following spring, as well as a half-acre of improved pasture. The mix included Perennial Ryegrass, Fescue, Timothy and Alsike Clover. Last summer, we let it grow and go to seed, and this spring it is out-doing the rest. It is thicker, greener and more vigorous, and we plan to cut it for hay this summer, as it will make a fine, leafy, nutritious hay for does in lactation and kids, in comparison to the stalkier hay in the tired pastures.

Our organic grain fields came up with a self-sown understory of red clover last summer. It did not bother the grain crops, and we had no problem harvesting the grains. Instead of being a "weed problem", it was beneficial, keeping the soil moist and loose, and providing a cover crop after harvest. We turned some new ground last fall, for grains this summer, so instead of turning the old grain fields under and planting them down to pasture, we decided to leave them come up in Red Clover and either graze or cut for hay this summer. This picture is of the Rye field we harvested last fall, with the old stalks intact. The cover crop of Red Clover overwintered, and to our surprise, the bits of Rye we left behind after harvest self-seeded this spring. We plan to cut this for hay as well, and would be able to graze it in the late fall as well.

Here is the emerging Oat field this spring, I just love looking out at our grain fields around us, they are a beautiful crop.

The same sad story of abuse and neglect can be read in the forest on this land. Again, it was clear-cut 20 years ago, and left to re-grow into a thick mass of tangled pioneer species. At this stage in it's growth, it is primarily young Poplar and Fir (80% of which is standing-dead or dying with dry-rot from overcrowding), with scattered young Maple, Birch, Spruce, Pine, and Ash. We burn a lot of Poplar, thinning out the crowded trees to make room for the hardwoods and longer-living Red and White Pines that used to dominate this area. In the process of cutting a logging road into the woods, we get a few cords of summer cord wood. Poplar is actually a great summer wood because it leaves no coals behind, allowing the stove, and the house, to cool down after the morning's cooking fire.

It take a lot of work to re-write the story in this land, but each spring we return to the thinned and tended forest, amazed at how the maples and birch seem to have doubled in size. Our new story is a story of rejuvenation.

25 May 2009

No nonsense noodles

I love homemade noodles, but have not invested in a noodle maker, and I found the process of rolling out, slicing, and separating the noodles a time-consuming process, and not fit for busy summer meals. So the day I came across this recipe, I was hooked.

Make your favorite pasta dough, or follow this basic recipe below. My recipe will make a meal and leftovers for two hungry adults.
3 cups whole wheat flour
tsp salt
Mix and make a well in the center.
Lightly beat 3 eggs and pour into the flour.
Blend and add a tablespoon ghee, melted butter or oil.

Gather into a ball and start to kneed with the heal of your hand. If the dough is still stiff or does not stick together, add a tablespoon of water at a time. (If you are using sifted white flour, you can use milk instead of water, but I find water works best with whole wheat). Continue to kneed adding liquid until a stiff dough that does not crumble is achieved. Cut dough into four quarters, shape each quarter into a ball. Cover and let rest 10 minutes.

Grate each fist-sized ball of dough on the large holes of a hand-held grater onto a floured surface. Keep grating onto a freshly floured surface so that the "noodles" do not pile up, but lay in a single layer. Lightly dust the "noodles" with flour and gently roll or wiggle them with your fingertips to separate any clumps.

The noodles can be boiled immediately, but I find better results when they are allowed to dry for an hour or more. I grate them onto floured cookie sheets and put them in the warming oven of my cook stove. Bring 4 quarts of water to a rolling boil, and slowly add the noodles, making sure the water stays at a boil. These noodles cook very quickly, about 2-5 minutes, depending on how long they were allowed to dry. Do not over cook them, they will return to a ball of mush!

Drain in a colander, and allow them to stand in the colander, making sure all liquid is completely drained. Stir in a tablespoon or two of ghee or oil to prevent sticking. They can be moved to a covered baking dish and kept warm in the oven until serving, or served fresh.

The uncooked noodles can also be used in noodle casseroles or soups, following your favorite recipe.
No nonsense noodles with tomato meat sauce and green beans

Dandelion Wine: out to pasture

There's nothing like a good pasture. The grazers and chickens have all gained a bit of weight and upped the production since the pastures have come up. Penelope, the milking goat, only gets a handful of grain to keep her busy while milking, and the chickens only need about half of their winter ration of grain, to produce twice the eggs. We are able to graze, with no supplement of hay or grain from mid-May to about the end of October here.

The kids are 3 months old now, and have been trained to the electric fence, and introduced into the herd. They are slowly integrating into the herd order, which takes a few weeks, and we had to watch that the does don't bully the kids around too much for the first few days. The two specks on the left of the picture below are the kids, then the two does, and of course Pilgrim, "the big goat", and the movable chicken tractor on the right.
The chickens are also much happier on pasture, they have bugs and greens to peck all day, and I think they are healthier, being moved every day onto clean ground, than they are in the barn with heavy bedding. I even have some extra milk or whey to give them, and the five hens often lay five eggs a day. If you look closely at the hen in the center, you can see some glossy green feather tips. The Rhode Island Red heritage is starting to show on the hens as they mature. Two of them look like straight Barred Rock, and two have green tints, and the white hen has thrown to the Rhode Island White heritage of the original ISA Brown commercial hens.

Roosty shows the most coloring, with red feathers and some long green tail feathers too.

There are some excellent Dandelion patches in the hay fields, it makes great hay too, more nutrition than either the Timothy or Red Clover it was sown to. The Dandelion is in full bloom, which means it's time for Dandelion Wine! Last summer I made some Red Clover and Daisy Blossom Wine. It was good, but I think I will like the Dandelion better. I might make a straight Red Clover wine later this summer, the Daisy added a bitter to the wine.

It didn't take long to gather 6 or so quarts of Dandelion flowers. I followed a simple recipe. Pour 6 quarts boiling water over the flowers. Cover and let steep for 24 hours. Strain the flowers out, pressing the liquid through a muslin cloth. Add 3 lbs organic sugar or honey, the grated rind and juice of a lemon and an orange (I don't have fresh citrus, so I use dried orange and lemon peel, and a dozen cardamom pods), and a pound of Golden Raisins. Stir until sugar is dissolved. Dissolve one package yeast in a cup of warm water and a teaspoon of sugar, add to the liquid mixture. Set crock or jar in a warm spot, away from drafts or direct sunlight. Cover loosely, and stir every day for three weeks. Pour into bottles, corking loosely to let excess gas escape, and store in a dark cool room. When fermentation is complete, cork tightly. Ready to enjoy in 6 months.

20 May 2009

For those aching muscles

Coming out of winter, and into the physical work of preparing ground, planting and weeding in the spring garden, we use muscles that lay dormant all winter. After the long dark, it feels great to be working outside and using all those muscles again. But they do sometimes ache at the end of a particularly productive day.

I have been slowly starting a medicinal herb garden, so this spring, I have some herbs to make my first herbal remedies, other than teas, teas, teas.

Comfrey Salve

Comfrey Liniment

I looked through my herbal books for what to use on sore muscles. Really, sore muscles need rest, but there is also tissue to heal, inflammation to reduce, and pain to relieve. Comfrey does the job very well of aiding the healing of muscles, as well as bones. Mullein can help reduce swelling, and relieve joint pain. Mint is a muscle relaxant, as well as having a pleasing aroma. Rosemary reduces inflammation. And Clove relieves pain. Sounds good to me.

To make the salve I started with a base of 8 ounces high-quality home rendered lard (although most prefer to use high quality olive oil or other vegetable oil). While the lard warmed on the stove, I finely chopped 1 1/2 ounces fresh Comfrey leaf, 1/2 ounce fresh Mullein leaf, 1/2 ounce fresh Mint leaf, and added the fresh herbs to the oil, along a heaping tablespoon dried Rosemary, and a dozen whole Cloves. To release the volatile oils of the herbs, mash the herbs with the back of a spoon every few minutes, and keep the pot covered in between, so that the oils do not escape. Keep a close eye on the hot oil, and gently cook it over a low heat for two hours. Cover and let cool for 8 hours. In the case of vegetable oil, you will be able to filter the herbs through a muslin cloth, being sure to squeeze every last drop of oil from the herbs. In the case of lard, re-melt the fat, just to the liquid stage, then filter as above into a wide mouth half-pint glass jar. In the case of vegetable oil, re-heat the filtered oil to 150 degrees Fahrenheit, and add 1/2 ounce of melted beeswax, stir well, and pour into your jar. The salve is ready to use as soon as it has cooled. Massage it well into the skin for deep tissue relief. It provides relief for about 6 hours, and can be applied 3 or more times a day. For extra pain relief, we use it in combination with Arnica cream.


8 ounces of fresh herbs were used to make the liniment. I used 5 ounces finely chopped Comfrey leaf, 2 ounces finely chopped Mullein leaf, and 1 ounce finely chopped Mint. Place the herbs in a jar with a well-fitting lid (like a wide mouth quart mason jar), and fill just to cover with Apple Cider Vinegar, about 1 1/2 cups. Liniments can also be made with alcohol, but Apple Cider vinegar has it's own benefits for sore or fatigued muscles. It is basically a herb vinegar, allowing the herbs to soak in the vinegar for at least a week, or up to a month. Place the jar in a dark place, like a cupboard or cabinet where the temperature will be consistent, and shake the jar vigorously twice a day. When you are ready to use your liniment, filter the herbs, and if desired, add a tablespoon of vegetable oil for a softer, massage oil consistency. If you add the oil, be sure to shake the liniment before each use. We use the liniment as a preventative, before doing heavy work or exercise. Apply it directly to the major muscle groups and rub it into the skin, it absorbs quickly. It also provides a more instant relief to sore muscles, working in combination with the deep tissue salve to rejuvenate and regenerate sore, strained muscles.

The Sanctuary and the Sting

The Flea Beetles are out and devouring. We have a hard time with Flea Beetles, especially the brassica eating variety. This area used to be a Brussels Sprouts growing region, and the last agricultural use these fields were put to was 15 years ago, growing Brussels Sprouts. And of course, they used lots of sprays to combat the flea beetles and cabbage moths. And of course, all that did was to proliferate the most resistant individuals. So even 15 years of these fields being sown to pasture, and cropped for hay, we still have a mighty infestation of flea beetles at the slightest hint of something good for them to eat.

The over wintered kale that had survived under mulch was just beginning to sprout. The flea beetles took care of them, no more sprouts. They mowed down an entire row of radish just germinating. I have only one organic method that seems to work. A 50/50 mixture of molasses and warm water sprayed on all surfaces of the plants will keep the flea beetles off, but it must be applied after each rain. I use it to get crops like radish, beets, chard and turnips up and going strong enough to handle some flea beetle damage, but it takes too long to spray all of my larger transplants of cabbage, broccoli, cauliflower, kale and Brussels sprouts because you have to cover the bottom sides of the leaves as well as the top. So I have decided to starve them out. These transplants can wait until mid-June before we put them in the ground. Last year, I put them out at about this stage, then covered them with row cover. But the flea beetles must have hatched under the row cover and managed to finish off a few of them before I noticed they were inside. So this year, they have a Brassica sanctuary in one of the Freezer Cold Frames. By the time they go in the ground, they will be strong enough to withstand the Flea Beetles.

The stinging nettle is growing like gangbusters, so we tried a recipe from a wild edible plant book for Creamed Nettles. I harvested these with scissors to avoid a lot of stings, but a few stings never hurt. Once they are steamed, they do not sting. Let them cool slightly and dice them on a cutting board. Make a basic white sauce, with any variation of herb or spice you enjoy, and mix with the cooked nettles.

I like to use yellow pea flower to make the cream sauce, and spiced with nutmeg and black pepper.

Served with Roasted Purple Potatoes with Creamy Tomato Sauce, and Whole Wheat Caraway Bread and Goat's Butter. They were just delicious, very much like spinach, and also full of vitamins and minerals. And nettles grow like weeds!

14 May 2009

To admire the flowers

We paid a visit to our neighboring small farmer. He keeps a small flock of goats and sheep, a variety of bantam and heritage chickens, and provides all of his own produce from a large garden and dozen fruit trees he planted 20 years ago when he started his small farm. Now in his mid-sixties, he is still going strong, but he values our help during haying season to put up 2000 square bales for his herd. And in exchange we use his tractor gear to put up our own 250 bales, and to work up our two acres for grain and garden. And at the same time we have developed a friendship, sympathizing with one another's success and struggles in the garden and around the farm.

Every spring, he has a profuse explosion of daffodils and crocuses and lilies and all kinds of beautiful spring flowers, and every spring, we admire them.


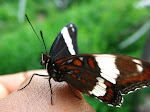
Found a few critters that I would like to find out more about. I have seen this very same species of spider on our potato plants. It is some kind of crab spider. It hunts rather than build a nest, waiting patiently for an unsuspecting herbivorous insect, which makes them a good beneficial insect in the garden.
Flower Crab Spider

And this one is new to me, some sort of nectar eating fly. It is not a bee, for lack of antennae, and it has quite a long proboscis to reach the nectar. Interesting critter, this one.

Greater Bee Fly

Our neighbor is also an amateur naturalist and birder, so he has dozens of birdhouses, bird feeders, bird baths, frog ponds, and trees planted especially to feed the birds. We always see a large flock of about a dozen Tree Swallows at his place, and I was lucky enough to catch the picture below.
His plum, apple and pear trees are just beginning to bud, when they are in full bloom, it is a beautiful sight.

11 May 2009

Making Ghee

Ghee is a clarified form of butter, traditionally used in Indian cuisine and culture. But ghee has some advantages over butter, it has a higher heat tolerance, and can be stored at room temperature for months. We store our extra butter as ghee. For the most part, we use it like oil for frying, it does not burn at high temperatures like butter does. But it can be used in any recipe that calls for butter.
To make ghee, melt the butter on low heat. The best quality ghee is clarified slowly.

The butter will separate into pure fat, and milk solids. Most of the milk solids floating on the surface will eventually sink to the bottom, and what remains floating will be separated out of the final product.

Bring the butter to a very gentle simmer. All of the water must be evaporated out of the fat in order for it to store for long periods of time. I have kept pure ghee for up to six months without any deterioration of the product. Be careful not to burn the butter while it slowly simmers for up to an hour. This is best done in a double boiler. When the fat does not bubble any more, the water is cooked out, and the ghee is ready to be strained.

Pour the hot ghee through a fine-mesh sieve, or a few layers of cheesecloth. The best quality ghee is at the top, above the sediment line, so if you are planning to store your ghee for longer than a week, be sure it is free of sediment. I pour off the best ghee first, then pour the rest at the bottom into my "greasing pot", and use it like bacon drippings to grease cake pans, etc. Ghee stays in a semi-solid state at room temperature, somewhat like olive oil when kept in the refrigerator, but melts into liquid gold when heated.

To get a taste of the slightly nutty, buttery flavor of ghee, try simply frying eggs in ghee. It is a great cast iron seasoner, ever since using ghee, my cast iron pan doesn't stick, no matter what I throw in it. Or try popping popcorn in ghee, and drizzling some on the popcorn as well. No popcorn like it!

The goats have made fast friends with Pilgrim, grazing together as a herd. Juniper even stood in his barn, eating hay out of his mouth because she couldn't reach his manger!

06 May 2009

Fiddleheads and other wild symphonies


The Fiddleheads are bursting out of the ground this week. These are my "wild asparagus". When picked young, they are a delicious spring vegetable. Of course, when picking anything wild, be sure to positively identify the plant first. Fiddleheads are a distinct wild food, and once you know where to find them, they are as reliable as spring rains.

Collect the fiddleheads as soon as they emerge from the ground, and snap them off. Like asparagus, the stem will snap at the point where it is still crisp and fiberless. The trick to removing the fuzz is to rub it off dry. Once they are wet, the fuzz does not come off easily. To prepare them, I prefer steaming rather than boiling. Bring the water to boil first, then place the steaming basket and vegetables over the water and cover. Fiddleheads will discolor if placed over low heat while the water comes to a boil. Steam them until crisp-tender.

They can be enjoyed with any number of sauces. Simply butter, garlic and salt. Hollandaise or cream sauce. Even as a cold vegetable in salads with vinaigrette dressing.

This is our favorite time of year to take long evening walks with the dogs. We wander through old logging roads to get front row seats at the nightly chorus of Spring Peepers, Robins, Sparrows, and Thrushes, their flutes and whistles syncopated by the drumbeat of breeding Ruffed Grouse and the windy whooshy wing beat of breeding Common Snipes. We even caught sight of two bear cubs dutifully waiting in a couple of birch trees about 1/4 mile off. Mama Black Bear eventually returned to her cubs, and we moved off to leave them undisturbed.

But not before I took a few video clips of the Peeper chorus. I was determined to catch sight of one of them, they were so close, but they were too well disguised. But you can see the rippling in the water, this pond was teeming with them.


Back on the farm, we have planted out most of the feed grains. One half acre of wheat, and one half acre of oats. We will also be planting about 1000 row feet of peas, as well as millet and amaranth for feed crops.

And I brought a bit of the wild into my herb garden this spring. We have a few patches of wild caraway around the pastures, and last fall, (after studying the plants at various stages of growth for over a year to be sure it was caraway and not poison hemlock), I collected what I could of the seed heads, giving me a few ounces to use in the kitchen, and some seed to start in the spring. But when I saw these second year roots popping up along the pasture this spring, I decided to try transplanting some of the roots into a prepared garden bed. Wild caraway is a biennial, so it only produces seed in it's second year. There is a cultivated annual variety, but like fennel and anise, it is a long-season crop, and frost usually threatens my nearly ripened seed heads. But these second year roots, which took quite well to the uprooting and transplanting, will produce early and hopefully prolific seed heads.

04 May 2009

Minutiae

Keeping an eye on the minute things. Like the first flower blossom of the season. Violets gone wild in the garden. And the daily emergence of all manner of insects in the soil and in the air.

This is a ground beetle, pretty fascinating creatures, without the ability to fly, they "bomb" their potential predators with a noxious gas. They are also carnivorous predators, and will eat up all manner of pests in larval stages.

Like this grub. I haven't positively identified it, but I suspect that it is the caterpillar stage of the pea moth.
This smallest of bees is now out with the wild honey bees.


Keep your eye on the little things that inhabit your garden. You will often find more allies than foes.