29 December 2008

A good stock

A good stock can make any meal taste gourmet. Sometimes I prefer the stock over the actual meat. I know that it is one of the most nourishing foods in my pantry, full of goodness and appetizing flavor and aroma. I pull out a bottle of stock whenever we feel a bit of a winter cold coming on, or when our digestion simply slows down due to the cold temperatures. But I also love to add stock to cooking grains like dry beans, chickpeas or barley. And of course, stock makes a delicious gravy.

There's more to stock than boiled bones. I like to add plenty of herbs, spices and vegetables to the mix. But I never salt it for fear that I will forget, and salt the dish again while cooking.

When making chicken stock I like to add 3 large carrots, a few parsnips, an onion, a bulb of garlic, and a fist full of fresh summery herbs: sage, thyme, oregano, marjoram, parsley, cilantro. I also toss in a few peppercorns.

When making beef stock, I add 3 large onions, a bulb of garlic, and some of the savory spices: a spoonful each of caraway seed, dill seed, coriander seed, a small spoon of cumin seed and peppercorns, and a few dried hot peppers (seeds included). As well as a bit of rosemary and sage.

Put your bones in a large pot and add water just to cover. I let all of the ingredients simmer for a few days on the wood stove, after all the meat and joints fall apart. Simmer long enough to cook the bones thoroughly, because you want all of the marrow and gelatin. I refresh the water level to the original amount when enough of it boils off. Some may not, but I always get a rich broth with a gelatin structure.

When using the bones of large animals you will be able to see when the marrow has been cooked out.

When my stock is ready, I skim off a majority of the fat, reserving it for other uses depending on the animal, fish out the larger bones with kitchen tongs, and filter the broth through a sieve. I pour the stock into canning jars and process them in a pressure canner. The booklet provided with my pressure canner gives the processing time as 25 minutes at 10 lbs pressure, below 10,000 ft altitude. But follow the instructions given with your own pressure canner.

After processing, when the stock is cooled to room temperature, it should be firm and gelatinous. Provided that the animal was mature and healthy. I have found that young broiler chickens do not have much gelatin or marrow in their bones, in fact, they grow so fast that their bones are easy to snap while butchering. Mature hens and older animals will make wonderful stock.

27 December 2008

Blossom Wine

My homemade Red Clover and Daisy Blossom wine is ready just in time for the new year, and the heart of winter. A touch of wine on a snowy afternoon warms my cheeks in place of the sun. I'm a wimp when it comes to alcohol, and Mr. Fritillary is a teetotaller, so we don't need much. I drink my wine like tea: 1/4 cup wine, a drizzle of honey and hot water. It has a distinctively floral taste, and pleasantly warms the belly. I made this first batch of wine in mid-July when the daisies and clover were in abundant bloom. But I missed the dandelions which I have read, make a sweet golden wine. Next June I'll start a batch of dandelion wine.

For this blossom wine I altered a Daisy wine recipe from "Edible Garden Weeds of Canada". This is my recipe:

3 Liters or Quarts Daisy Blossoms* (Ox-Eye Daisy Chrysanthemum leucanthemum grows in my area, but English Daisy Bellis perennis can also be used)
3 Liters or Quarts Red Clover Blossoms* (Trifolium pratense)
no stems or leaves
*Always be absolutely sure of plant identification before collecting or consuming any wild plant. I use Petersons Field Guide to Edible Wild Plants to aid identification.
6 Liters or Quarts boiling water
1.5 Kg or 3 1/4 lbs organic raw sugar or honey
500g or 1 lb chopped dates (can use raisins or sultanas)
500g or 1 lb whole wheat kernels
1 Tbsp each dried orange and lemon peel (can use zest and juice of 2 oranges and 2 lemons if available)
6 cardamom pods and 6 cloves (can be omitted or substituted for favorite spices/herbs, ie cinnamon, mint, vanilla, anise, lavender, etc)
1 pkg or 2 tsp dry active yeast

Wash blossoms, by submerging in water to expel any insects. Place flowers in stone crock, glass or food grade plastic, pour boiling water over blossoms, and let stand 24 hours. Filter out blossoms and add remaining ingredients (except yeast) to the liquid. Stir until sugar or honey is dissolved. Dissolve yeast in 1/2 cup water and 1tsp sugar. Let yeast stand 10 minutes, then add to mixture. Cover with clean cloth or muslin and let stand at room temperature (same as for rising bread) 3 weeks, stirring daily. After 3-4 weeks when no more bubbles rise, filter liquid into bottles and cork lightly. ** (I used mason jars with loosely screwed plastic lids.) When fermentation is complete (no gas is released), tighten cork or lids. Store in a cool, dark place until wine is clear. Should be matured for drinking in 6 months.

Makes about 3 Liters or Quarts of wine due to evaporation.

**At this point you could put aside a portion, or all, to make blossom vinegar by adding mother to the wine. See Apple Cider Vinegar.

Baking with Freshly Ground Whole Grains

Using a hand cranked steel-roller grain mill to grind our whole wheat and rye kernels, the flour we use for baking is full of bran, and is coarser than purchased flour. We could go through an extra step, put it through a stone flour mill and filter out the larger flakes of bran to produce a product identical to the whole wheat flours we used to buy from the somewhat-local organic flour mill.

Sifted flour
Bran (that fly must have snuck in the picture, they are pesky little things in the summer)

But to these light flours I used to add multi-grain mixes or cracked wheat to produce a hearty loaf of bread with the nutty aroma of freshly ground grains. The advantage of making a finely-ground, sifted flour is that I could use it in any recipe without modifying the ingredients. But cooking with seasonal ingredients, primarily from our garden, has taught me the art of modifying recipes and substituting ingredients, so I chose instead to become familiar with my own unique flour. Besides, our tastes prefer this slightly coarser grain in cakes and bread. The texture of my cakes is similar to cornbread when made with half wheat flour, and if you have ever tasted bread made with a significant portion of rolled oats, that is the texture of my wheat and rye breads.

Cake showing flakes of bran
Baking my first batches of bread from our flour, I followed a familiar basic whole wheat recipe, but struggled with the texture. I have found that working with a flour so high in bran changes the ratio of liquid to flour in any given recipe. Where a recipe calls for one cup of whole wheat flour, I use 1 1/2 cups: the extra 1/2 cup being similar to a recipe that lists an optional amount of wheat germ, for example, that can be omitted without changing the desired texture.

The benefits of baking with freshly ground flour are, a superior flavor and nutty aroma imparted by each particular grain, and the superior nutrition. Grains contain Vitamin E in the germ and bran. Vitamin E is an oil, all oils or fats, when exposed to air and oxidation, go rancid and become free-radicals in the body when consumed. By storing our grain whole, and grinding only what we need, the Vitamin E, along with other familiar vitamins that are removed with the bran and added again to "enriched" flour, are consumed in a state that is beneficial to health.

Consuming white flour, can be found, in part, to originate with the gentry and aristocratic classes of Europe. Pastries and breads baked solely using white flour were more expensive, since nearly half of the whole wheat flour, the bran, became a waste product, meaning that nearly twice the amount of grain had to be produced, stored, and then ground, before filtering out the undesirable bran. Bran was the food of horses and peasants in those days. But the white flour, and the whiteness of the resulting products, was desirable to the upper-classes also because it was reminiscent of purity and delicacy. Women of this class were preferred to have pale white skin, while peasant women, who labored under the sun, had bronzed and dark skin tones, not unlike the brown bread that sustained them.

As the Industrial era approached, and manufacturing was centralized, products like flour were produced further away from their markets, and needed to be stored longer. The cheaper whole wheat flours that the lower classes were used to consuming would go rancid, and the industrialized process necessitated cheap white flour for the masses. In the first half of the 20th century, it was "discovered" that this now widely available cheap white flour no longer contained vital ingredients, and deficiencies were prevalent in society. But industrialization could not afford to make freshly ground whole wheat flour available, so the cheap white flour, which was once ironically the food of the aristocracy, was "enriched" with the necessary vitamins.

Since the 1970's we have been in the "health era" as it could be called. And once again, whole wheat flour, and and foods like yogurt, became fashionable among progressive mostly middle-class families. Food manufacturers are now happy to make these "health products" available, but of course with a higher price, "healthy" being a value-added quality. So what was once the food of peasants and horses, is now unaffordable to a large population of working poor. Up to the 1970s, a loaf of whole wheat bread was half the cost of white bread, now it is nearly double.

I find this story interesting, and I do believe that the flour we are making at home is similar to the flour of peasants two centuries ago, but it is not out of these sentiments that we are motivated to change the way we eat. The way we eat is simply an extension of the way we live.

So here is my basic bread recipe, the recipe that finally gave me a kneedable dough, and a well textured bread:
3 cups warm water (I use potato water most times, or even vegetable water from canned beans)2 tsp sugar
1 tsp yeast (I have lots of yeast in the air from baking, so double the yeast if you don't bake regularly)
2 lbs wheat, freshly ground
1/4 lb rye, freshly ground
1 tsp salt
optional: tsp caraway or tsp rosemary

When the hens start laying more eggs in the spring, and the goats start milking next month, I will experiment with some richer bread recipes.

23 December 2008

Dark days indeed

These are our shortest days, we get down to about 8 1/2 hours of daylight. I love being on the other side, knowing that the light is returning, and spring will be upon us before we know it. We spend the long evenings talking, planning, dreaming and reading aloud to one another.

Every cold morning we wake to a new ice painting on the kitchen window.

Wishing you all a happy holiday.

15 December 2008

Dual-purpose Provider Beans

Beans are generally an easy crop to grow. They need a moderate amount of compost, not near as much as tomatoes and other heavy-feeders, because as a legume, they fix nitrogen, but they do like more compost than peas. In our garden, we don't have any pests that attack the bean plants or leaves, but they are vulnerable before they emerge to cutworm damage. As we improve our garden soil, we will see fewer and fewer cutworms. In the meantime, our best preventative is to get the plants up and going as quickly as possible. This means planting when the soil conditions are warm and moist, and choosing a vigorous variety, which is a characteristic we have selected from our own previous crops. It can help to soak the beans overnight, this way the seed will not dry out in the ground, slowing germination. The seedpods are vulnerable to damage from the Corn earworm and the Cowpea curculio, both of which bore holes into the pods and feed on the seeds. But neither did much damage to our crop, the Corn earworm seems to prefer corn, and the Cowpea curculio kept mostly to the peapods. Beans can also succumb to mildew in wet seasons like 2008, but a healthy crop will be able to resist these vulnerabilities.

This year we grew two varieties of beans, Provider for green beans, and Jacob's Cattle for dried baking beans. Canned green beans, being our favorite green vegetable for the winter, are a staple. We planted 200 row feet in 2008. We enjoy baked beans occasionally, but not as a staple, I would be happy with 10 lbs, so we planted 100 row feet. The two varieties are side by side, and we do save seeds from them, beans generally self-pollinate, so even heavy insect traffic in the prolific flowers do not seem to cross-pollinate the two varieties. They have not crossed in three years. I choose my plants for seed saving at the flowering and early fruiting stage. That's when I can pick out the early and heavy producers that look healthy and dark green. I tie red wool yarn around the bush, so that it is obvious to see when harvesting, not to pick any pods from these plants. All of the pods that these plants produce are allowed to go to seed, 6-12 plants will give you a pound of seed.
Well, with so much rain early in the season, we had a bumper crop of green beans. I had never seen so many pods on the Provider plants, by mid-season they were heavy with green beans. The more I picked, the more they flowered. The Jacob's Cattle beans have never impressed me with their yield, they only put out about 15-20 seedpods and quit flowering. The Provider plants, under identical conditions produce 25-50% more pods.

Maturing Jacob's Cattle pods
Our 200 row feet of green beans proved to be too prolific for our needs, we were eating a huge mess of buttered green beans, and I was canning them as quickly as they could grow. Once I had enough canned, and we couldn't give any more away, I could easily see that we would not be able to keep up with them. I hate to let food go to waste, especially when we have worked the ground, used precious compost, planted the seeds, and weeded the crop. I tried feeding the pods to the chickens, but not much interest there. I even tried giving some to the cow, but that was just a waste when she had lush clover pastures. So I thought I would simply let part of the crop go to seed. The dried bean seeds would either be good for eating, or at the very least, we could chop the dried beans in the meat grinder and feed them to the chickens as a high-protein supplement over the winter. One third of the crop was enough to keep us in fresh green beans for the rest of the season. The other two-thirds of late maturing bean pods did not fully dry on the plants, I had to pick them before frost, and let them finish curing indoors.

The baking beans dried well on the plants, the pods were brittle and the beans hard. I prefer letting them dry on the plant because I can pick the pods off the plants on a dry day, and put them aside to shell on a rainy day or when the season slows down.

100 row feet of Jacob's Cattle baking beans yielded one pound of seed, and 6.5 lbs of beans. It was a poor crop, but even still, six good pots of chili or baked beans.

After shelling the Provider beans, I let them dry out until they were hard and cured. This late and unexpected crop yielded 4 lbs of beans. All told 200 row feet of Provider beans produced 103 lbs green beans, 2 lbs seed, and 4 lbs beans. The dried beans look like a kidney bean, so I thought I would try them out in a chili, and see how they taste.


I soaked equal parts of Jacob's Cattle beans, Provider beans and Chickpeas overnight, and made a chili the following day. It turned out to be a cold snowy day, perfect for chili. And it tasted great.

Seeing how prolific the Provider variety is, and the added benefit that the early green pods can be eaten, and the late pods allowed to dry for baking beans, this one variety may become my single dual-purpose variety of bean. I enjoy the colorful markings on the Jacob's Cattle variety, but once cooked I could not tell them apart. In the end, I got my 10 lbs of dried baking beans for the winter. As we begin to make garden plans for 2009 we will have to decide whether to try another variety of baking bean, or to plant Provider beans for both our needs.

11 December 2008

Hulless oats

One of the goals we set for ourselves in 2008 was to grow grains. Growing our feed grains was a priority, to cut our expenses in producing eggs, dairy and meat. Every time we cut out a major expense, it allows us to use the money we would have spent on purchasing grain, to invest in a tool, like a bicycle generator, that will again, allow us to cut out another expense, like gas for the generator. This is the way that we gradually step down our dependence on "making" enough money to buy the things we need. This approach to "earning a living" is what keeps us both at home. With most of the jobs we do at home, we are able to "pay" each of us $20 an hour, when we compare what we produce, with the cost of buying it, and transporting it home. We pay close attention to the time we spend on jobs, like harvesting grain, and if it is taking too long so that our "wage" drops below $10/hour, then we make changes, and experiment with different techniques and tools to improve our efficiency and bring our "wage" back to a "living wage".

This wage analysis is a part of how we prioritize our goals each year. Our health is the true measuring stick, if we need to make a change to improve our health, lower stress levels, or improve the quality of our food (including improving the health of livestock and soil), then it becomes a priority goal for the coming year. Second to our health, we tackle our largest expenses. For 2008 it was feed grains, along with some of our house grains. For 2009 we will continue to improve our feed grains, by growing millet and peas for the chickens and the goats, and we will focus on growing more of our house grains.

No one can do everything, all at one time, but we can learn to do a lot more than we think we are capable of, by taking on one thing at a time. This builds skills, confidence and experience so that each year we can take on more. Growing all of our house grains is a pretty big goal, and we were not sure exactly how the harvesting and threshing would work out, so we prioritized growing wheat kernels for 2008, and experimenting with our techniques and tools. Now that we have gained skills, tools, experience and, not the least important, confidence, in small scale grain production, we can add more grains to the list, like hulless oats, quinoa, chickpeas, lentils, etc.

Anticipating this two or three year plan toward growing our grains, in the spring of 2008, we purchased packets of seed to plant experimental and/or seed crops of hulless oats, quinoa, millet, amaranth, and chickpeas. With these experimental plots we could work out the needs of each crop in our climate: growing conditions, nutrient levels, spacing, types of pests, planting and harvesting dates, harvesting and threshing techniques, and expected yields. This way we do not make a large investment in the first year, risking a failed crop due to lack of knowledge, or a crop we cannot harvest for lack of time or tools. This summer I was able to record the length of maturity and frost hardiness of each of our experimental crops so that next spring I know planting dates, I recorded yields so that we know how much to plant, and we experimented with threshing techniques so that we can plan ahead if we need any tools.

This spring we planted a 3' x3' plot of hulless oats. Compared to the feed/hulled oats we grew for the animals, they had similar requirements. The thing we wanted to know is how easy they are to thresh, and which technique would work best.


When the grains were fully ripe, I simply stripped the seed heads into a bucket to harvest this small plot, but we could also harvest a kitchen plot, about 30' x 100' with a hand sickle in an afternoon. We have found that harvesting the heads, instead of cutting the stalks, makes it easier to thresh, although it takes longer to harvest. But if weather forces us to take the crop off in a hurry, we can do so with the sickle or scythe, and spend the time we would have spent harvesting, threshing the grain instead.
We have been threshing our wheat with this meat grinder with great success. The design of the latest harvesters use the same principle of a turning screw to thresh the grain. We have made one improvement to the hand-cranked grinder, by attaching the drill to drive the auger. It makes the job a bit smoother. Why not a motor? A motor uses more power, and it is running the entire time, like brushing your teeth with the water running. With the drill (which by the way is also the way we "motorized" my hand crank butter churn), Mr. Fritillary has more control. We will be building a removable hopper as another improvement.
Oats are a softer grain than wheat, so we wondered if the meat grinder would chop too many of the oat groats (or seeds). We tried it without the blades, but it left much of the oats unthreshed. So we put the blades back in, and ran the oats through, not a one was chopped, and all of the heads were threshed.

So here you can see the oats in their hulls, the groats threshed and winnowed, and finally, the rolled oats.

Ice painting

My kitchen window gave us a spectacular display Wednesday morning. The temperature dropped to -18C (-5F I think) overnight. We hang wool blankets over the windows at night in the winter, when we pulled them up in the morning we were greeted with this ice sculpture or ice painting. As the sun came up and the light changed, the ice painting transformed.This is an hour before sun-up, when the winter sun lolls below the horizon. The flash reflects off the ice formation.
With the sky lightening up I could get a detail of the ice fans.
The sun just peeked over the horizon.
The sun is now completely over the horizon.

And here, with the sun working its way to the south along the horizon, I could get the whole window lit up.
It is full light now, about 9am, but the sun has not burned off the night chill yet.

By about 10am the ice began to melt. It reminded me of Tibetan butter sculptures which they carefully carve out of colored butter, then put out under the sun. As the sun melts the sculptures they are reminded of the transience and preciousness of life.

It remained about -8C all day, so by 3pm, an hour and a bit before sunset, the ice fans began to form again. It was hard to capture them on camera because of the white background of the snow and sky. But they showed up against the wood of the front porch.

They look like feathers with a quill along the middle.

They were forming fast enough to watch the progress. It was quite beautiful. And quite distracting as well, I couldn't help but watch my window most of the day. Between chores and meals, canning meat, rendering tallow and winnowing wheat. It was like having the art museum come to my kitchen. Life is what you make of it out here. It's the details, things you might easily miss, that make it a life worth living.

08 December 2008

Tasting the sauerkraut


Boy, you can't beat homemade kraut! I have this revelation every time I try something homemade for the first time, that I had never really tasted it until then. I was an ambivalent eater of sauerkraut until this week. Now I'm a convert.

We came home from the internet access center, late one afternoon, both of us particularly hungry, for it was a cold evening and we work up an appetite on our bikes. But it had been a busy morning, and untypically, I did not have a hot meal waiting for us in the oven. But we had boiled some of our brisket cuts in salted water, from the two year old bull-calf we recently butchered. This makes a kind of pseudo corned-beef that will keep in the cold room for a week, as a cold cut. And there was bread in the cabinet, and the sauerkraut was due for it's first tasting. So into the frying pan went olive oil, a few cups of kraut and some dill seed and caraway seed. I could have chopped a few onions in there too. And next some sliced beef soaking up the remaining oils and flavor. A little gravy on the side and toast in the oven. With a sprig of fresh parsley from a plant I transplanted into a pot for winter nibbling. And within 10 minutes we had a delicious nutritious entirely homegrown and homemade meal that not only satisfied our appetite and nourished our bodies, but put a smile of satisfaction on our faces, just looking down at the plate in front of us. What a blessing.

The value of quality: thriving on winter feeds

The next four months, December through March, bring our harshest temperatures and stinging wind. The average overnight temperature for January and February of 2008 was -10C, but we usually get a week-long cold snap or two, dropping to -30C overnight. And we also get a good January rain, melting the top 3 or 4 feet of snow accumulation. Winter can be harsh, and it can be a hardship to survive, but with preparation, including food storage and sheltered buildings, winter can also be a welcomed time of quiet, rest and reflection. It is a counterpoint to the almost frantic pace of a short summer.

Winter can be difficult for our animals as well, after all, chickens were originally jungle-fowl, and goats and horses were originally desert dwellers. Breeding can encourage hardy characteristics like fat coverage, thick fur or down, and high-metabolism, but encouraging these characteristics to develop requires a higher quality of feed. And even hardy animals need a well-sheltered spot in order to thrive. We have designed the barns to shelter the animals from the prevailing wind, as well as taking advantage of the warming winter sun. The hay and grain is stored in the north-west end of the barn to insulate from the wind, and the animals are on the south-east, allowing direct sunlight to warm the pens at first light, dawn being the coldest time of the night. Along with this, the goats and chickens have a low-roofed and well bedded box, inside their pens, in which to sleep. This keeps draughts off of them at night, and takes advantage of the body heat they produce, radiating it back to them.

From here, their ability to thrive is dependent on a high quality diet. Animals, like us, can only eat so much bulk in a day. North American children, who survive mostly on junk-food, have become malnourished, a term we usually only connect with starving children in Sudan and elsewhere. Likewise, if offered only low-quality feed, an animal will become malnourished, fail to thrive, and if still required to produce eggs or milk, will either quit, or do so at the cost of their lifespan.

A quality diet consists of adequate protein, rich in minerals and vitamins, and contains a source of fat as well. Most of us can tell the difference between poor and high quality foods when looking at the raw materials. Whether it is carrots, green beans or hay and grain, common senses can tell us a lot about the quality of a food: color, taste, smell, texture, crispness, etc. Green leafy hay that smells like a summer pasture is obviously better than stalky bleached dusty "hay". The green hay will not only be more appetizing, but will contain all of the essential ingredients of quality feed. A good quality wheat kernel can be distinguished from a poor one by a plump large size, golden color, and a sticky gluten center when chewed between the teeth. Those who purchase their feed, rarely have the opportunity to choose, but rather must rely upon the feed mill to make those choices. In a good grain growing season, the grain market for human consumption can become flooded, and often, high quality grains can overflow to the feed mills. But in not-so-good or even average years, all of the high-quality grains will be used for human consumption, and the leftover, low-protein, low-quality grains trickle down to the feed mills, sometimes at a high price because of a lack of supply due to failed crops.

This situation describes a portion of our motivation to grow our own grains, along with strong concerns regarding food security and the environmental and ecological costs of industrial farming and transportation of the crops. We rented a tractor to cultivate the two acres for our grain in the fall of 2007. But we planted and harvested it by hand. Most of the grain was seeded by broadcasting, but we planted a quarter-acre with a garden seeder to compare yields and coverage between these two methods. Mr. Fritillary harrowed the broadcast seed under with our horse, Pilgrim. The grains eventually started to ripen by late August. I will write more about our grain growing and harvesting, it was a difficult season for grains, with so much rain, we were both lucky and worked hard to bring in a crop at all this year.

We harvested using a combination of techniques, but mostly we harvested with a scythe. In this way, we harvested grain, straw and weeds together. These grain fields being organic, and turned from pasture the year before, the predominance of weeds were vetch and red clover, both valuable high-protein legumes. Too many of these "weeds" make it impossible for a harvester to move through the field and thresh the grain properly, but they presented no problems for our scythes, and they dried out in a matter of hours under a hot sun. The scythed wheat is stored loose in the barn, off the ground, and is almost entirely dust free.

The cured vetch and red clover add food value to the bundles of grain we feed to the chickens, they eat the greens as readily as the grain, and the mixture of greens helps to balance the calcium/phosphorous content of their feed and provides much needed Vitamin A, which can be seen by the deep yellow of their egg yolks. The chickens make quick work of the grain, served in bundles with a box underneath to catch fallen grains and heads. When they have cleaned off all of the heads, the remaining straw is put down as bedding or nesting material, and turned into compost for the garden. The wheat we grew this year is of a higher quality than I can buy from the local bulk store, or the local organic grain mill, which means that it is above 14% protein, perhaps up to 16% protein. Typical feed wheat is between 10-12%. Our high-quality grains mean that we do not need any protein supplements like soya meal (which causes thyroid problems) or linseed meal (which usually contains rancid oil residue).

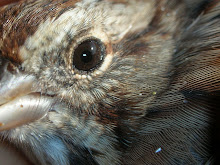
These are our young pullets, hatched out this summer, from our Isa Brown hens (a common industrial laying hen from a Rhode Island Red crossed with Rhode Island White) and a Plymouth Barred Rock rooster. There are four distinct colorings: black barred, white with grey bars, white with red wing coloring, and red with white feather tips.

The oats are fed mostly to the horse, who eats them straw, chaff and all, and the goats who nibble off the grain heads, leaving the coarse straw behind. Feeding the oats with the chaff or hulls pretty much eliminates the chances of colic in either the horse or the goats. These oats are about 12% protein, but they also contain more sugars and oils than the wheat, which are necessary for the goats who are producing kids as well as keeping warm.

The winter rye was ready to harvest in early August. We planted only 1/4 acre of rye, so we harvested it with a hand sickle, and stuffed it into feed bags, stacked in the barn. The straw of rye is a high quality bedding, it was used to thatch roofs and make horse collars, etc. meaning that it does not readily break down or absorb moisture. We use the straw to bed down the goats, a foot of this underneath them makes for incredible insulation, and they can nest down into it on cold nights.

The goats also make quick work of picking off the rye heads, their nimble mouths find each and every one, leaving behind the valuable straw. Rye is similar to wheat in protein content.

Another feed crop we grew this summer: mangles or fodder beets. They grow just like beets, but much bigger, and higher in sugars and fiber. The green tops were greedily gobbled down by the goats after harvesting the roots. And the roots are stored in our cold room with the carrots and other root crops. The mangles contain some protein, but are primarily a source of energy or sugars, as well as a treat that definitely gets their appetite and digestion working.

We feed the two of them 3-4 lbs a day, chopped and lightly cooked with a tablespoon of molasses. Served warm this way, around 10 am, it provides energy in the morning after a cold night. We do not serve them the mangles first thing in the morning because the goat's ability to produce body heat comes from the digestion of fibers (ie. hay), not sugars. Goats can easily get a chill by eating concentrates (ie. grain or fodder/roots) on an empty stomach. So we give them a chance to get a good belly full of fresh leafy hay in the morning before the mangles and molasses. Pilgrim likes a bite of this too. The molasses also works as a preventive for Ketosis, a metabolic disorder of pregnant or recently kidded goats in which they do not have enough metabolized energy to cover the demands placed on their body. This is just a general definition, for more specific information about ketosis, please read about it from a credible book or website.

Here they are nose-first in the mangles, notice how Penelope's tail (the one in the front) is held straight up, showing her pleasure and appetite. You can also see in the picture the bulges they are growing, late in their pregnancy. Juniper, the little one, is growing well. She especially needs a high-quality diet since she is not only producing a kid or two, but is still growing to full maturity. She is coming along well, both of them have put on thick downy coats, are bright-eyed and have a ready appetite, and have laid down some condition, which they will need to draw upon in the first month of lactation.

Molasses mouth, licking off every last drop.

05 December 2008

Well, don't literally put the fridge in the ditch just yet...

For a bit more motivation on the Ditch the Fridge Challenge, I will tell you all of the wonderful uses we have found for our defunct fridge and freezer...

The first fabulous use of the freezer was as a chick brooder. We turned the freezer on it's side, so that the door opened like a hatch, and the largest surface area (the side of the freezer) was now floor space for the chicks. We laid down cardboard and some coarse sawdust, installed a light bulb on the ceiling (after snipping the electrical cord to the freezer, and re-using it to splice on a light fixture). And screwed in an eye-hook on the door, and a latch, that holds the freezer door open just a bit to allow ventilation. For the first few days the chicks needed supplementary heat. We use hot water to radiate heat. I made a slip pillow to put around a 5 gallon bucket (any bucket, or pot, with a tight fitting lid that fits inside the freezer, and will not be needed again in the house, will work). The pillow around the bucket keeps the chicks from burning their selves as they warm themselves against the bucket, the same as they would under a heat-lamp. For about a week I refreshed the bucket with not quite boiling water, just to the steaming and tiny bubble phase, twice a day. As early in the morning as I could, and as late in the evening, to keep them warm over night. We had a thermometer in there and it kept at a pretty consistent 30-32C. Watching to make sure that it doesn't get too warm when a fresh bucket is installed, in which case I would open the door a bit more, and close it again when it stabilized. After a week, the chicks started making their own heat, and as the freezer is designed as an excellent insulator, their own heat was radiated back to them, and the hot water buckets were no longer needed. At two weeks I had the door open about 6 inches during the day, with a clear plastic window to keep them from hopping out, installed like a child's barrier 3/4 of the height of the opening, again to allow ventilation. By the end of three weeks, the chicks were gradually exposed to outside temperatures, and ready to be moved out of the brooder.
Encouraged by our success with the brooder, we tried it as an incubator. It was a bit harder to keep it up at 37-39C than it is to keep it at 30C, meaning boiling water changed more often. I also made the latch to close the door tight to hold heat well, and taped small sticks around what would be the top edge of the freezer, so that when the lid was closed, the rubber seal around the lid was held out enough to make ventilation gaps. And by moving the freezer-incubator to a part of the house where the temperatures fluctuates less, we were able to incubate eggs without power! The best part about using hot water as a heat source is that it is also a source of humidity. The humidity meter read at a constant 50-60%.

Now for the fridge, when we moved the young chicks outdoors, they still needed a warm place to huddle at night, so we put the fridge on it's side and took off the door. By propping the door against the fridge so that it covered 3/4 of the opening, and just left a gap for the chicks to go in and out, we had a cozy little spot for the larger chicks to keep warm at night.

Now the fridge has been measured and evaluated as a kid box. For the first two weeks of the kid's life, they cannot produce their own heat very well, and need an insulated box to keep warm. Our fridge was a small model, and is not quite adequate, but if it were a full size fridge, it would work very well as an insulated hidy-hoe for kids and lambs.

They also make convenient storage containers for potting soil or as instant raised beds for urban potato growers, etc (You will just have to work out the drainage issue). And in spring can be used as cold frames for transplants. With glass or plastic over the top, and the lid off in the daytime, they will keep plants insulated, holding the heat from the sun like a greenhouse. Just put the lid on at night to keep the frost out. Of course you can also add coffee cans or plastic bottles of hot water at night and on cloudy days to keep them growing.

Or the fridge/freezer can be turned into a big sophisticated version of my camp cooler, with a small pump running cold well water into the basin, and an overflow pipe running water away, to keep your perishables fresh.

Any other ideas?

So next time you see a defunct fridge or freezer in the ditch on big-garbage day, and you have already used up all of your own fridges and freezers for various brooders and cold-frames, you can rescue even more from landfill. And you get a free extension cord thrown into the bargain.

03 December 2008

Ditch the Fridge Challenge

I challenge you to Ditch your Fridge! With cooler, or down-right cold, weather coming on, it is a perfect time to challenge your dependence on your refrigerator.

When we moved off-grid, we came with a small fridge and small chest freezer. We had a small generator, battery bank and a solar panel. We could run the darn things, but it was ridiculously expensive to produce enough power to keep our food stored this way. I didn't keep much beyond dairy products in the fridge at the time, without a cream separator, the fridge was pretty full with pots of whole milk, bottles of cream and yogurt. Once it was skimmed, the milk was turned into cheese or fed out. I kept some leftovers in there, where space allowed, but mostly my fridge was an integral part of our dairy processing. The freezer was full of our year's supply of meat, some frozen vegetables and fruit, and extra butter and frozen milk to last through a two month dry period, before the cow calved again.

When we realized we had to make some changes, figuring out how to do without refrigeration was a huge challenge to the milk maid in me. I could do without the freezer, canning the meat, vegetables, fruit, and even the milk for the dry spell. What to do with the extra butter, stumped me until Mr. Fritillary enlightened me about ghee, a traditional Indian or Hindu way of processing butter into pure butterfat, which stores at room temperature like oil. So that took care of storing butter, when fresh butter is not in season. The freezer was soon empty.

I was hesitant to ditch the fridge, but with winter coming on, I was able to cool my twice-daily pot of filtered milk, in a basin of cold water, and let the cream rise in an unheated room that kept at refrigerator temperatures. I could also keep my cream and yogurt in the cold room, as long as winter lasted. But I knew I would need a cream separator by spring. We found one in time for warmer weather. Now I only had our daily table milk, a few liters of cream, a few liters of yogurt, and a pound of fresh butter to keep cold at one time. We do not have a spring or any running water on our property, but the water from the well stays quite cold, even in the heat of summer. We took an old camp cooler, and filled it with cold well water, and submerged everything into the water. Even the butter went into pint jars, same as leftovers or opened bottles of applesauce, etc.

The cooler is on an outside porch, where no direct sun falls on it at any time. In the heat of summer the water must be changed two or three times daily. I put the fresh milk, and separated cream into cold water, morning and night. And change it if need be again in the middle of the day. Come spring and fall, the water only needs to be changed in the evening, the cool night air keeps it cold, and does not start to warm up until late afternoon. In the winter, I change it every few days to keep the water from going stale, and even have to bring the cooler into an unheated room to keep it from freezing out on the porch.

Refrigeration can be done many ways. A small pump from the well can run to a cooling basin, with an overflow, to simulate a spring. Water is a more stable cooling element than air, so it works well. But air can be cooled by a small fan pushing air past a mist or trickle of cool water. In hotter climates, the ground temperature a few feet down can be cool enough to store food.

But designing a way to cool and store your food is only part of the challenge. You may also have to change the way you cook, and even the types of food you eat, to ditch the fridge. Take a look at the contents of your fridge. Eggs and many cheeses can be stored in a cool cabinet. Eggs store quite well at 60-70F for at least two weeks. The only reason they are refrigerated at the grocery store is so they can be kept for 3-6 months. Homemade preserves, pickles and jams will keep in a cool cabinet or submerged in the cooler, for a week, so preserve your food in one week sized portions. With a backyard garden, produce is eaten straight from the garden, and with the exception of lettuce, will keep in a cool cabinet for a few days. Vegetables like shelled peas or broccoli heads can be put into a jar or water-proof container, and submerged in the cooler and will keep fresh for a day or two. For the most part, the refrigerator only prolongs the distance food takes to get to your table. The fresher your food is, the less you will need your refrigerator.

The challenge I have set for myself next year is to expand my range of fermented vegetables. Many people prefer to freeze vegetables over canning them for the nutritional value that is maintained in frozen vegetables. More than just cabbage can be fermented, including beans, cauliflower, roots, and cucumbers. Even a medley of vegetables, onions, peppers, garlic and herbs can be fermented together. Fermentation preserves the nutritional content, since vitamins are never destroyed by heat, and pathogens are kept from spoiling the food with friendly-bacteria that also add their own health benefits to the foods. And fermented foods can be kept for months, or even a year, in a cool room at 50-60F.

Ditching the fridge is not only environmentally progressive, it can wean you off of a dependence on consistently available cheap power, and give you the opportunity to change your relationship to the food you eat.